GooInjector
Injects the parameters of a new resin into an already sliced .goo or .ctb file, without re-slicing
What you get
.goo and .ctb files in all versions
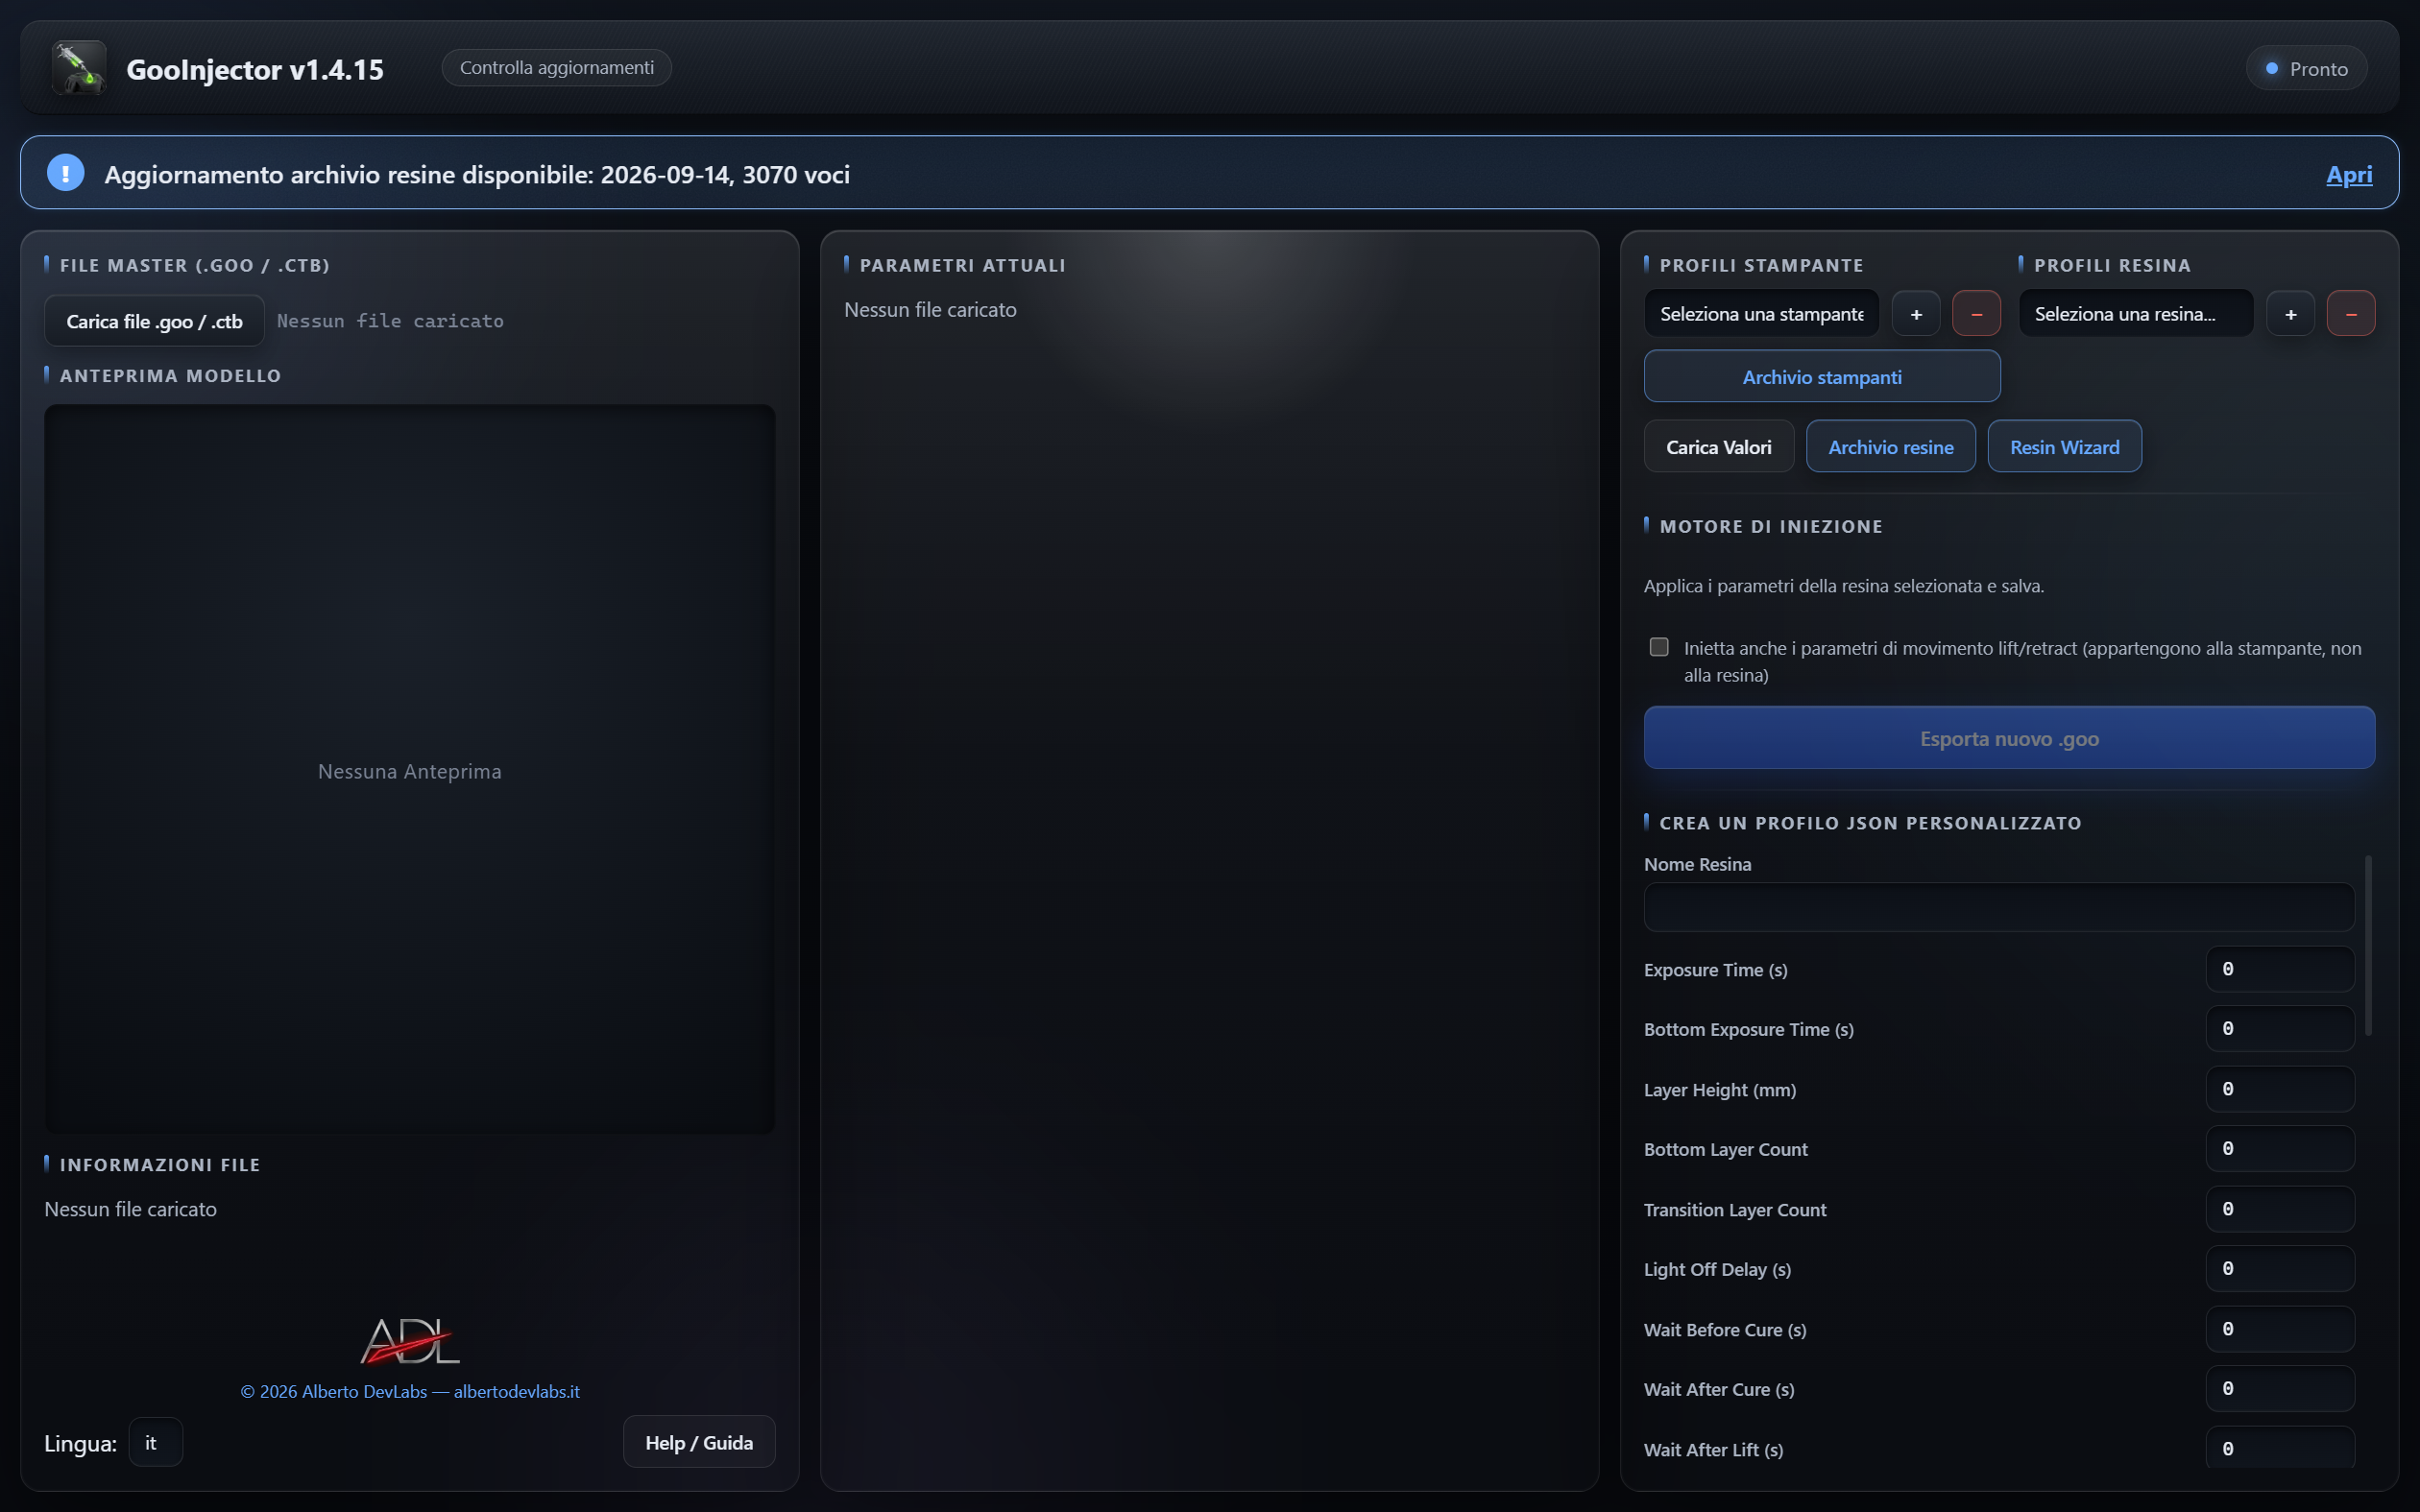
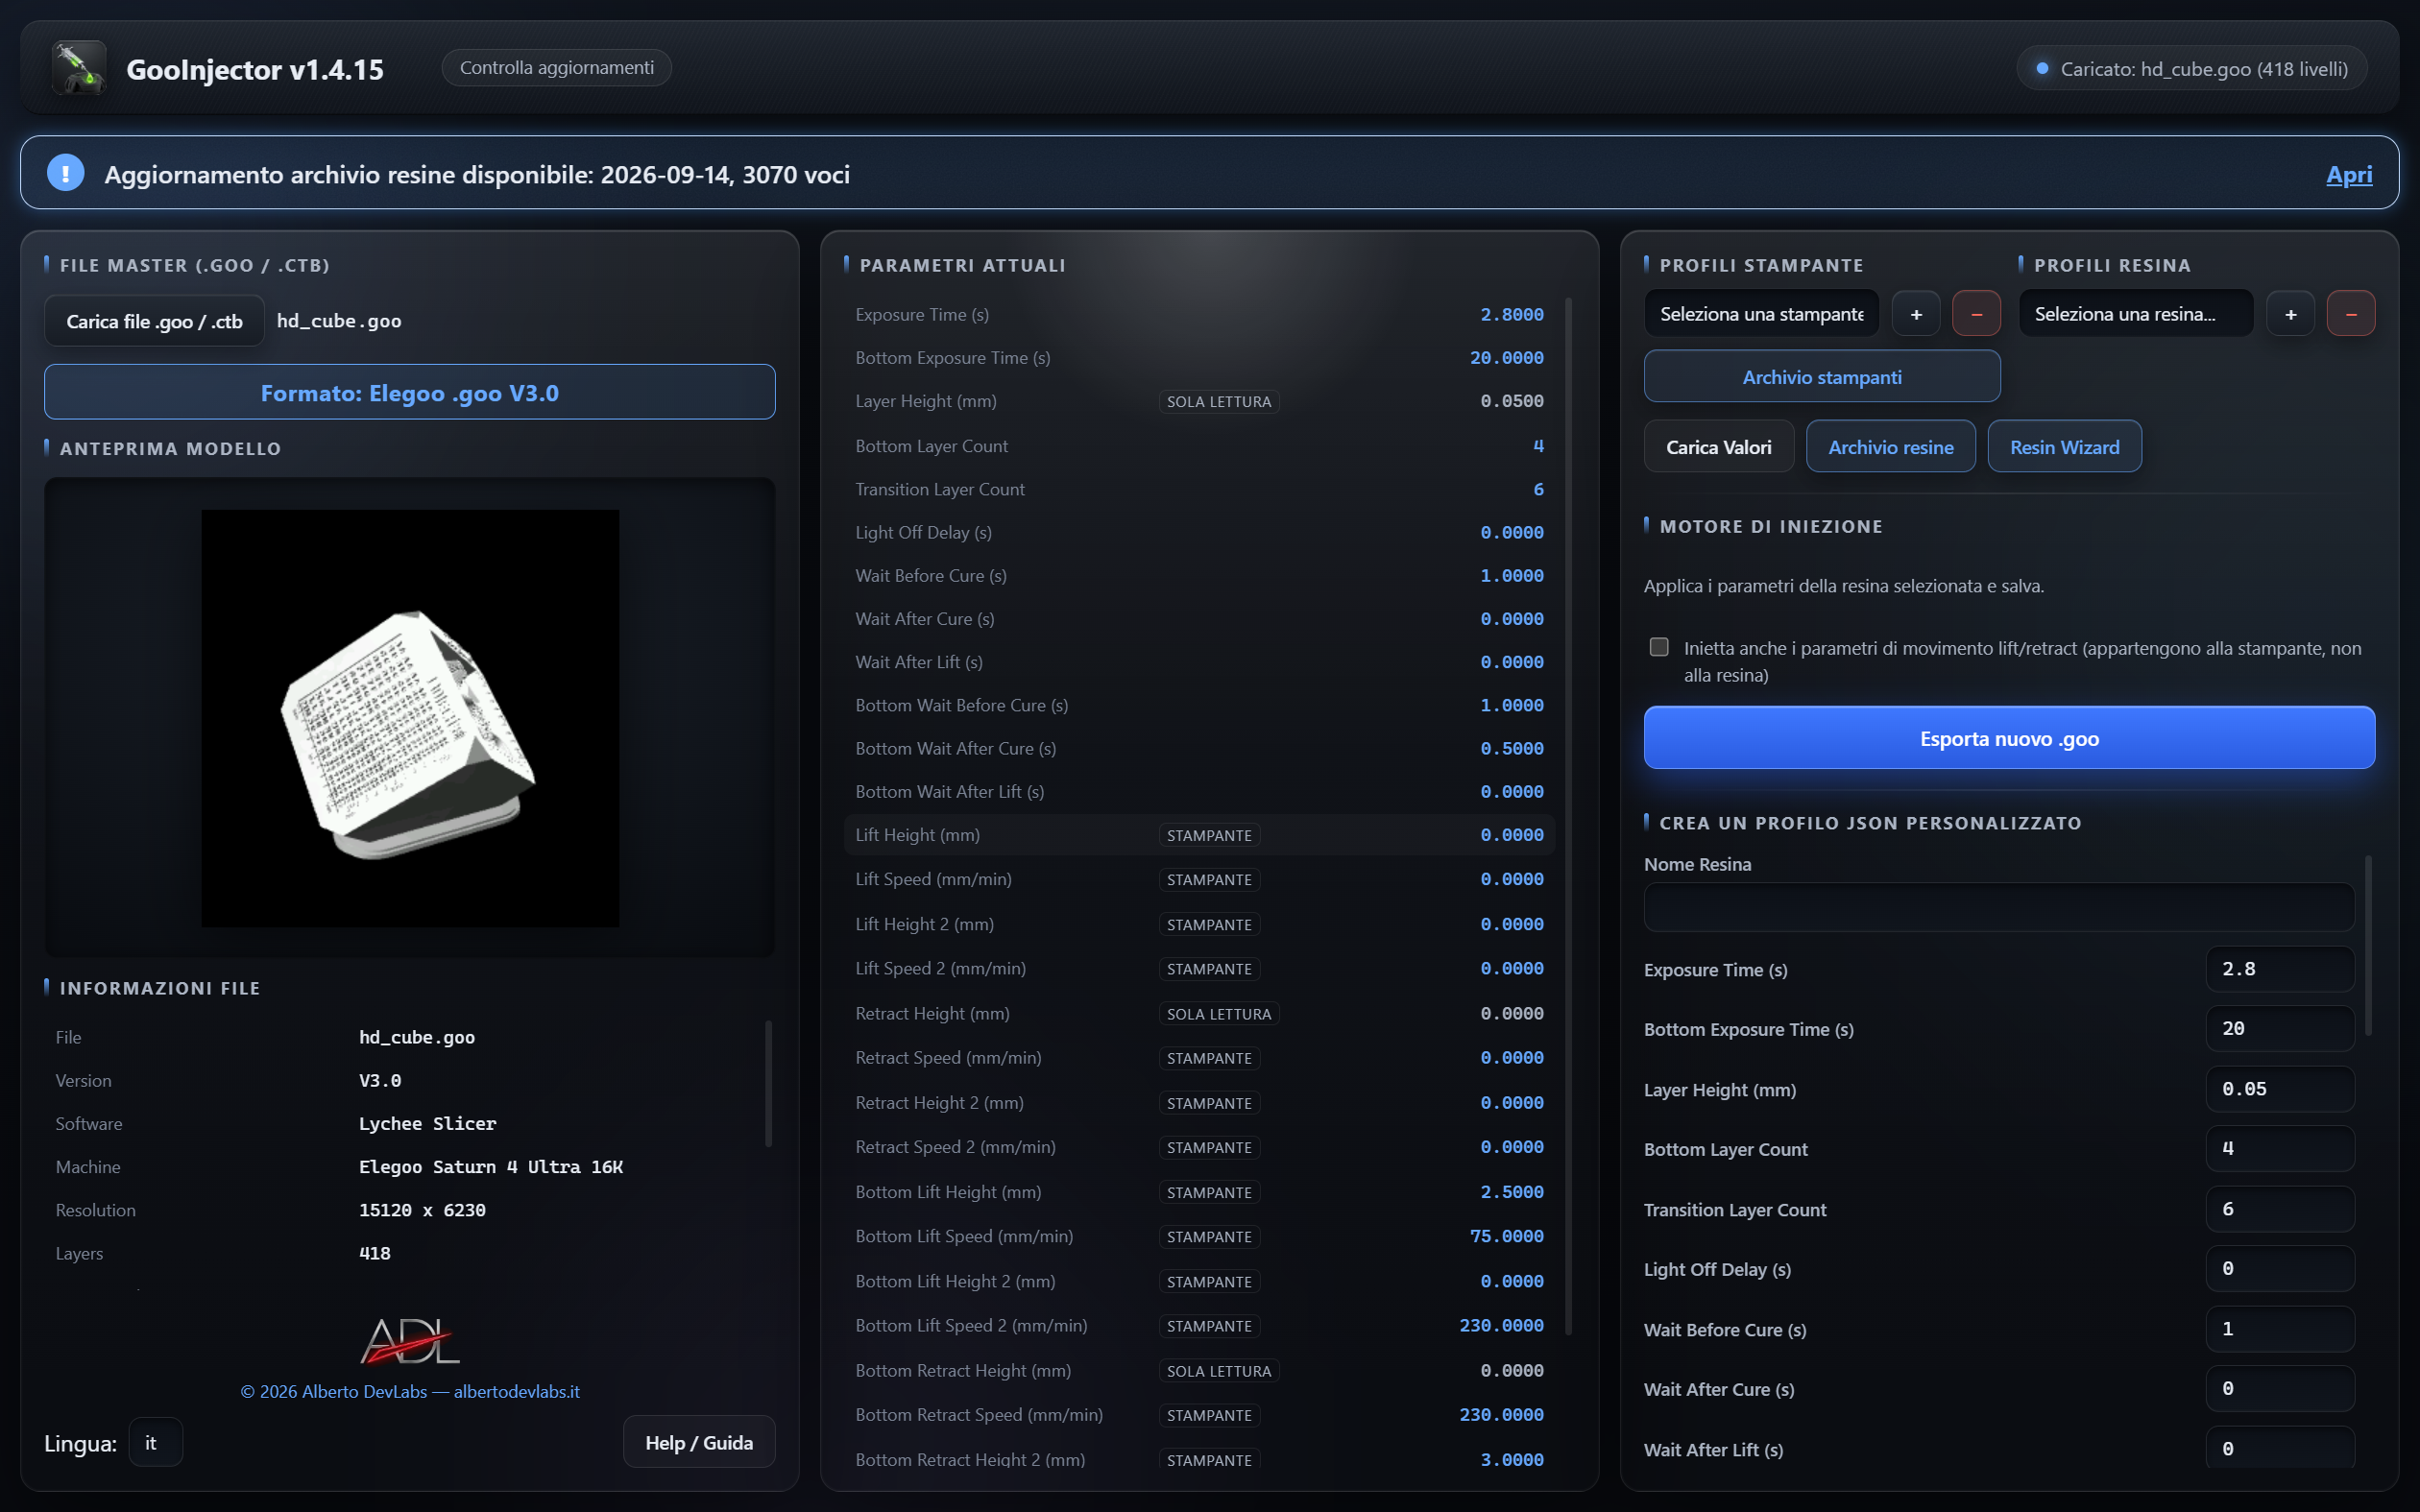
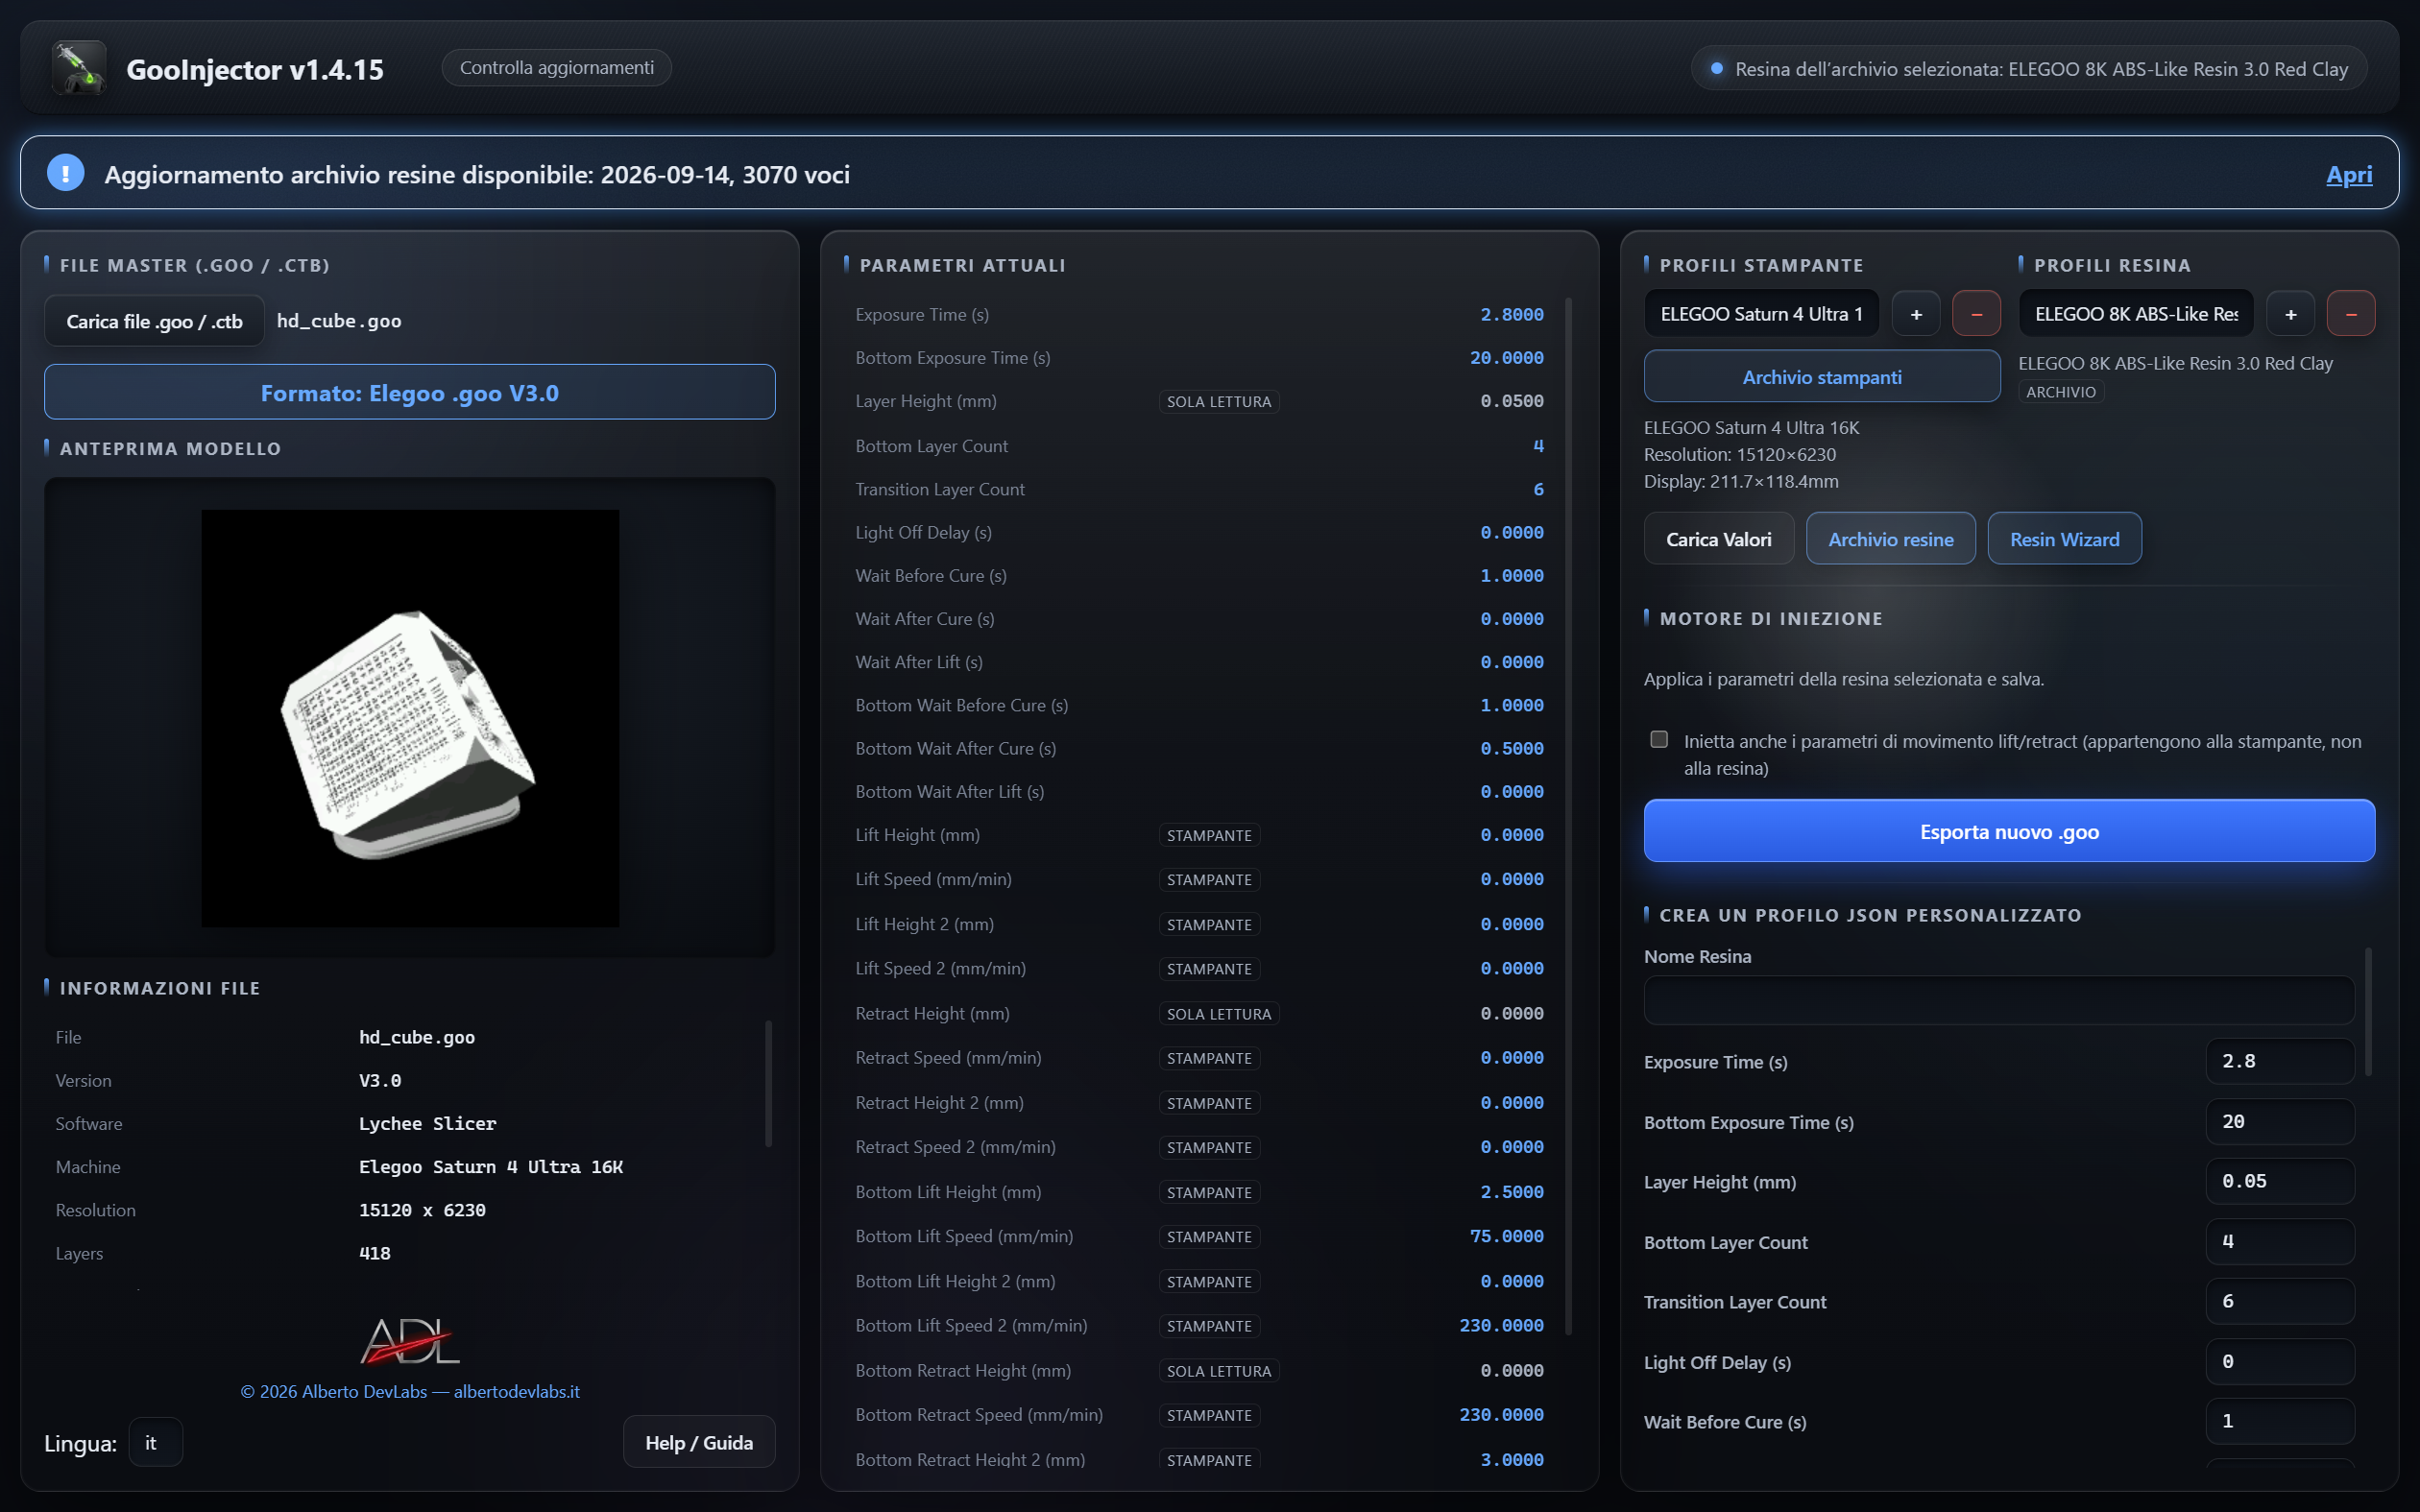
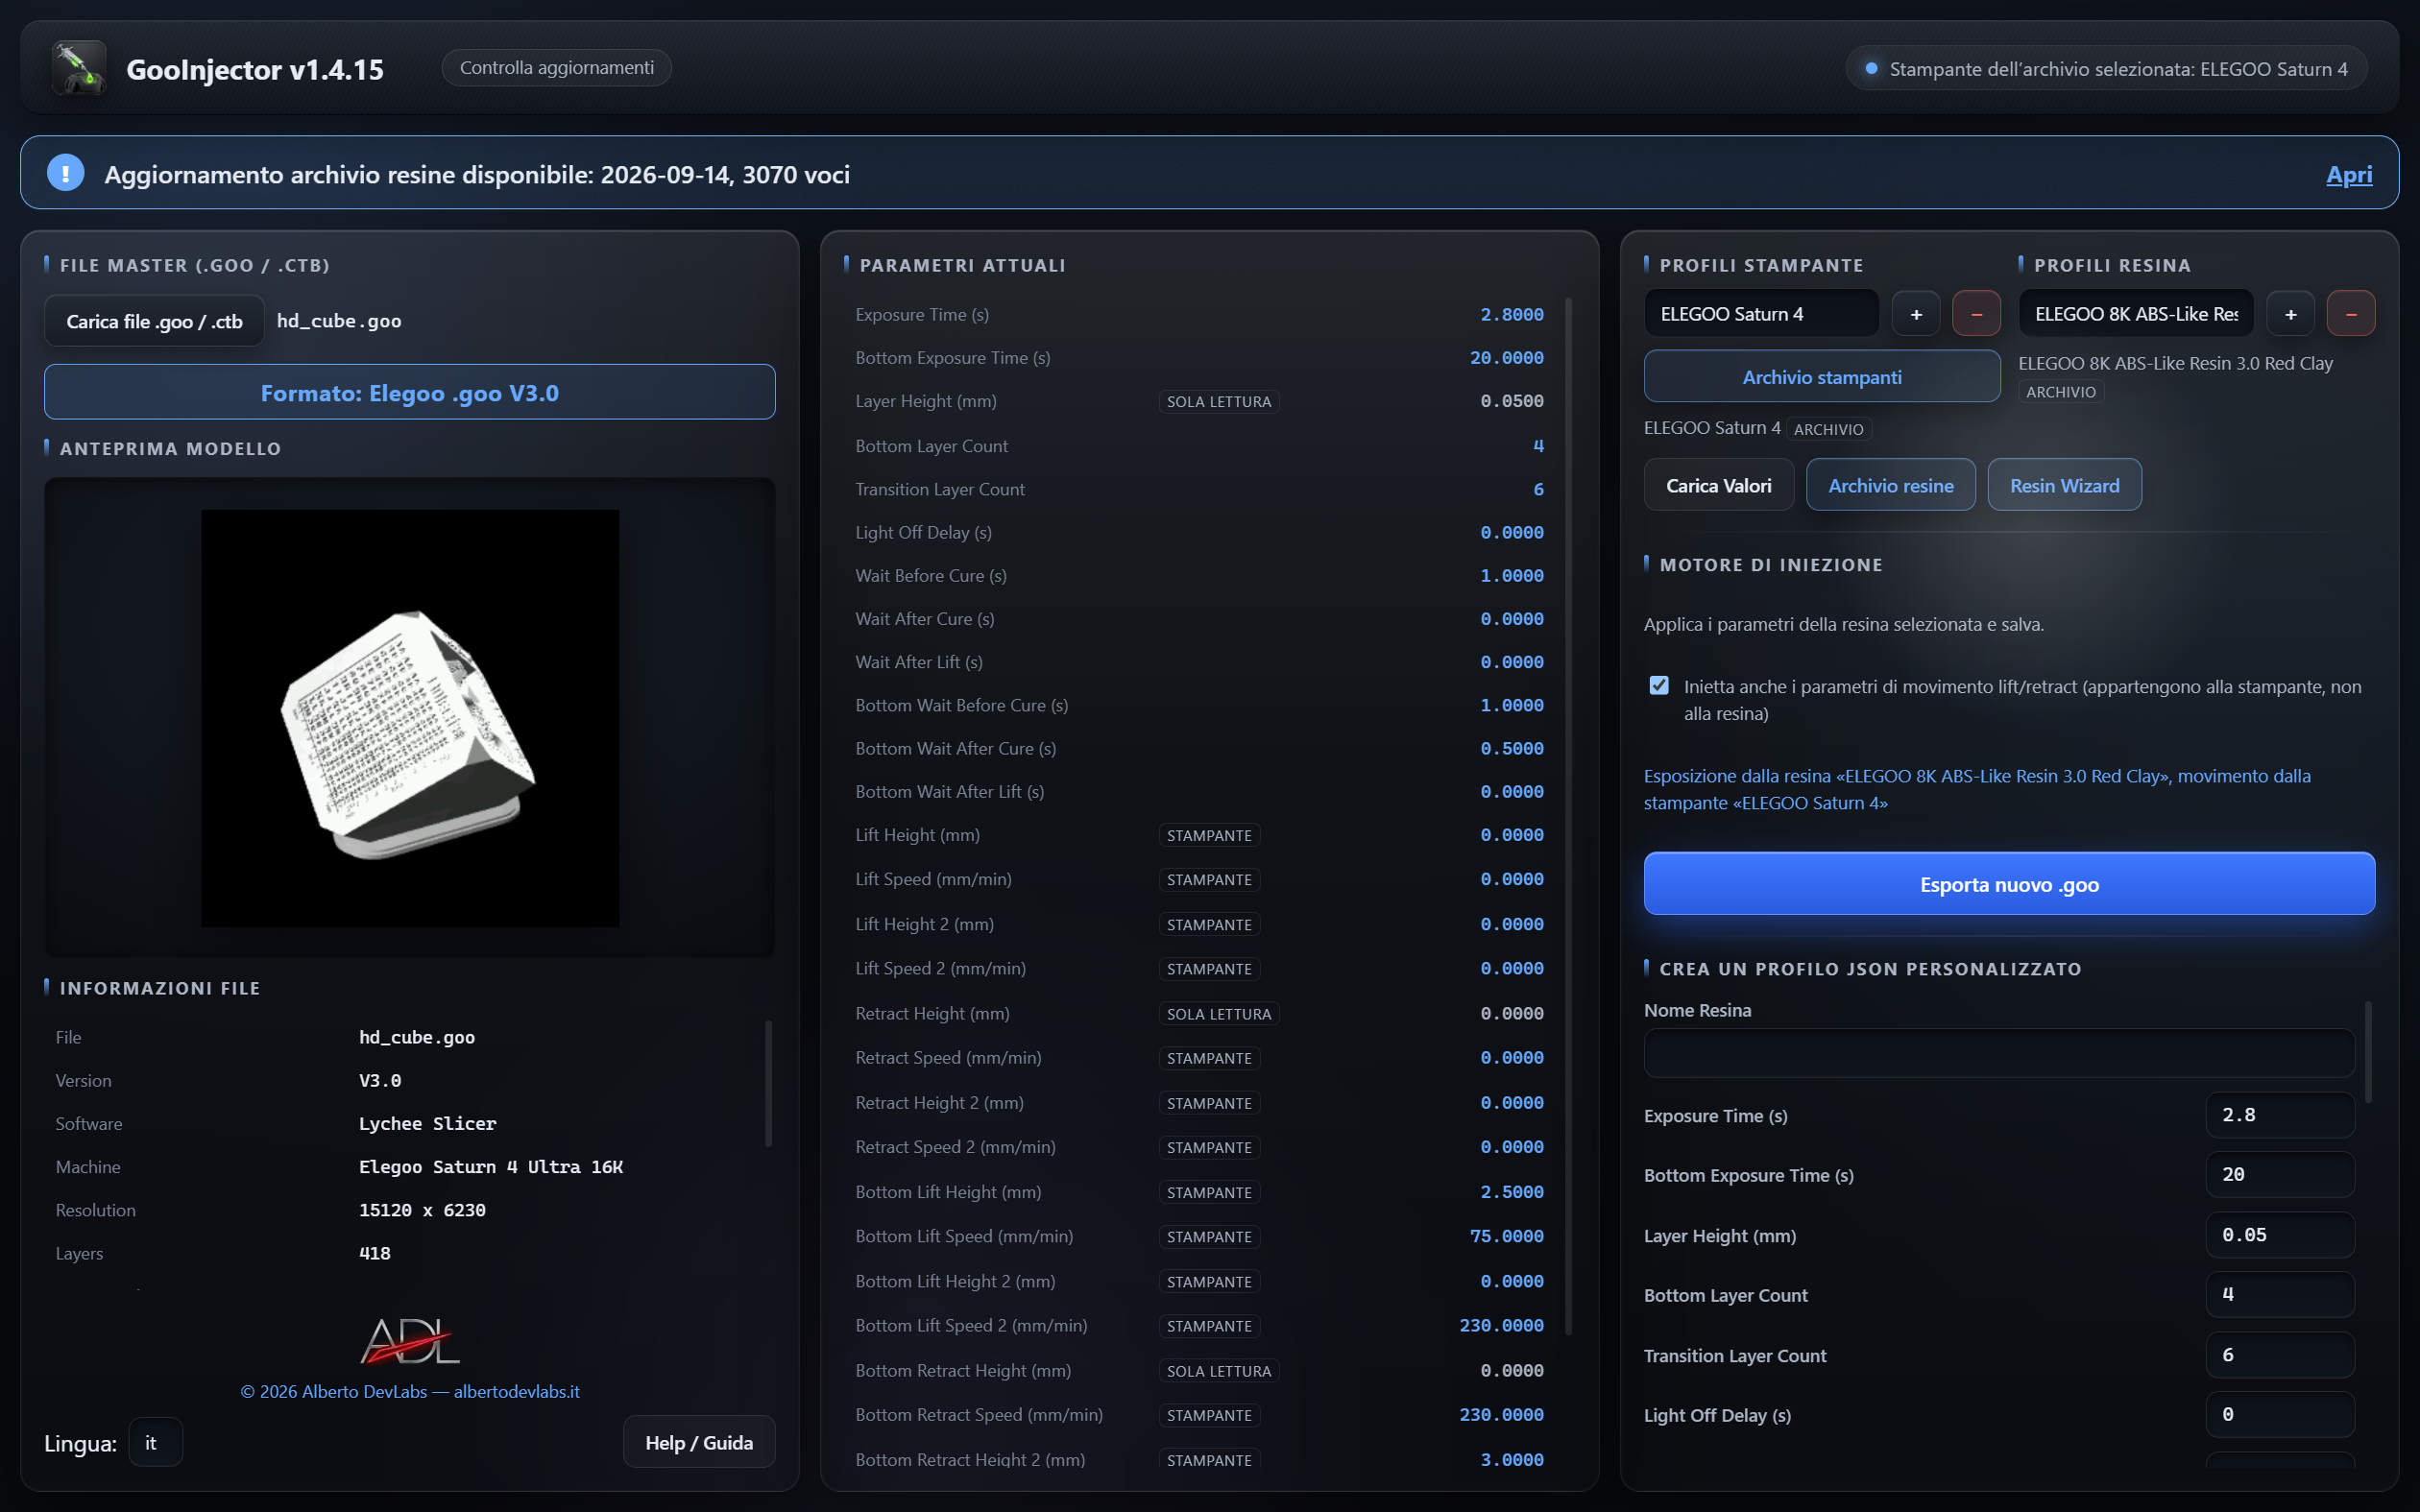
Opens Elegoo V3.0 .goo files and Chitubox .ctb files in all versions handled by UVtools (v2, v3, v4, v5 and the encrypted v4/v5 variant of recent printers) with model preview, file information, the declared format shown large below the file name, and the print parameters: all 30 of the .goo, and for the .ctb the ones the version stores (all of them from v4 on)
Injection into the header and into every layer
Injects the resin parameters both into the header and inside every single layer, recalculating the exposure ramp of the transition layers (for the .ctb using UVtools' rules); the exported file keeps the format, extension, images and encryption of the one that was loaded
Three parameter groups
Parameters split into three groups: resin (always injected), lift/retract motion (only on request, with the dedicated checkbox), layer height (never touched, read-only)
Screenshots and video
Features
Before/after comparison
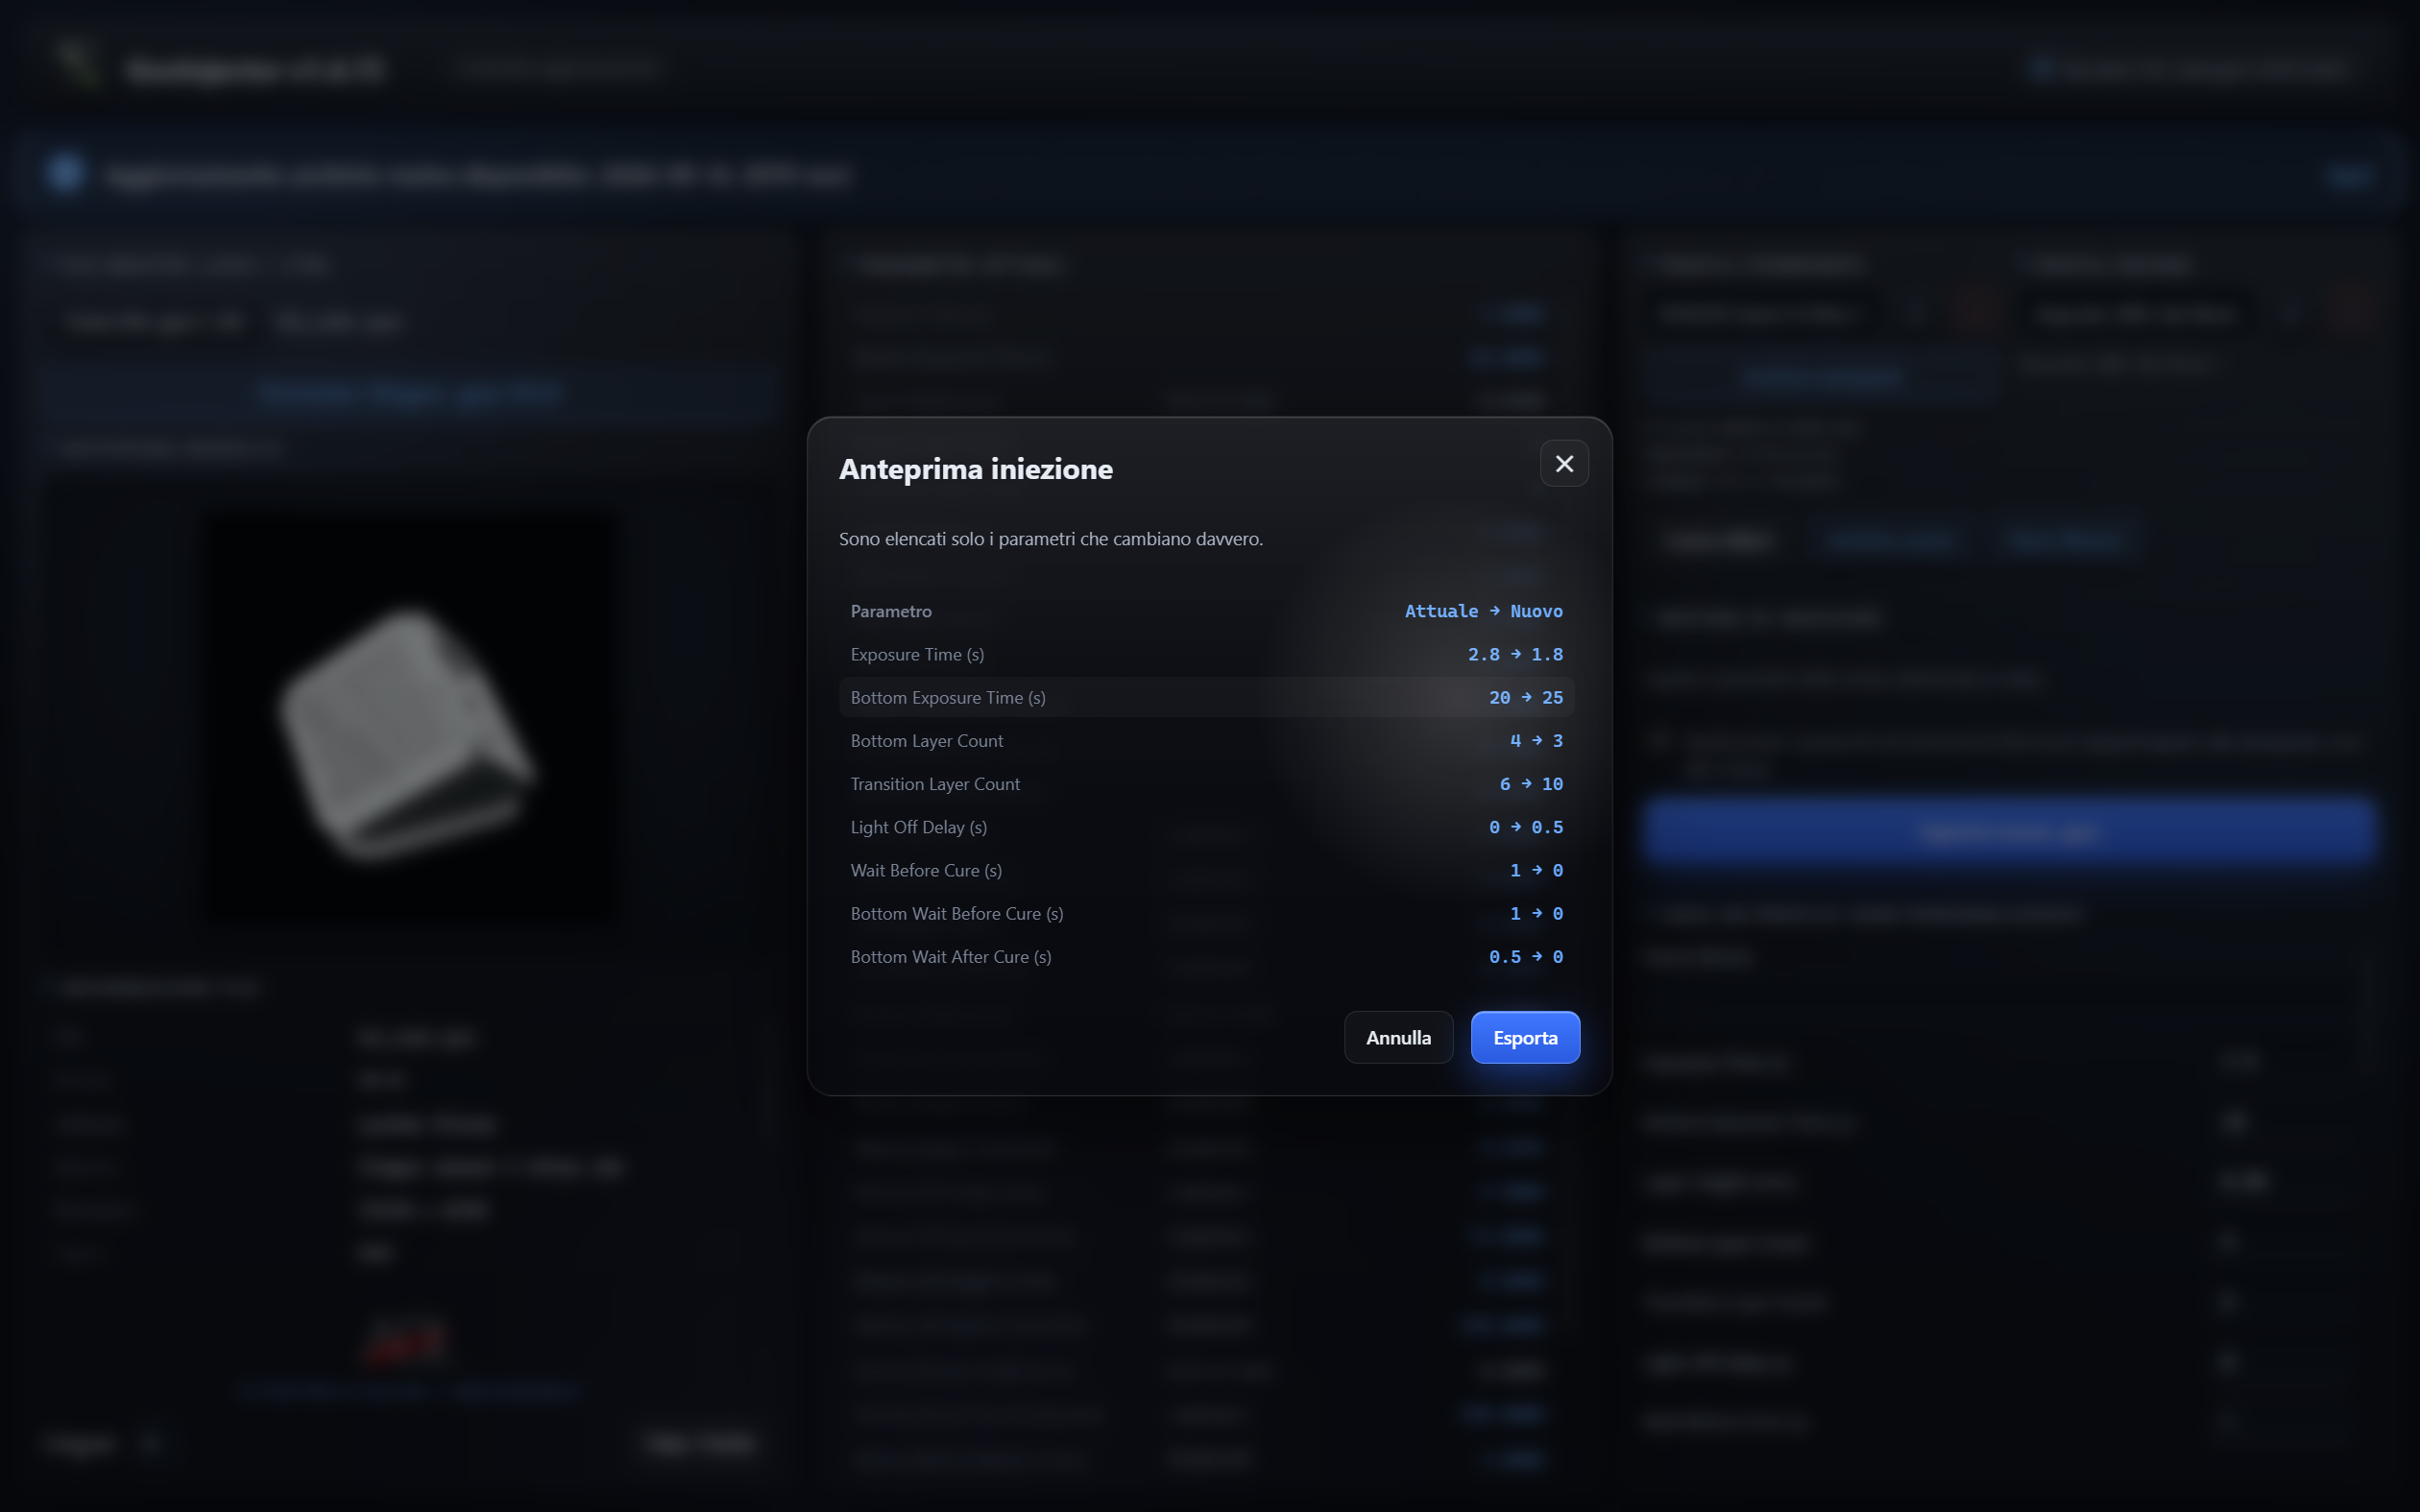
Before/after comparison showing only the parameters that change, to be confirmed before every export
Byte-for-byte identical saving
Saving without changes is byte-for-byte identical to the original, for the .goo and for every version of the .ctb: only what the user injects changes
Printer and resin profiles
Printer and resin profile management: import of Chitubox .cfgx and manual .json files, adding and deleting with confirmation
Manual profile editor
Manual resin profile editor with validation of the numeric fields; "Load values" brings the selected resin, or the one from the database, into the editor so you can save it as your own profile
Resin Wizard
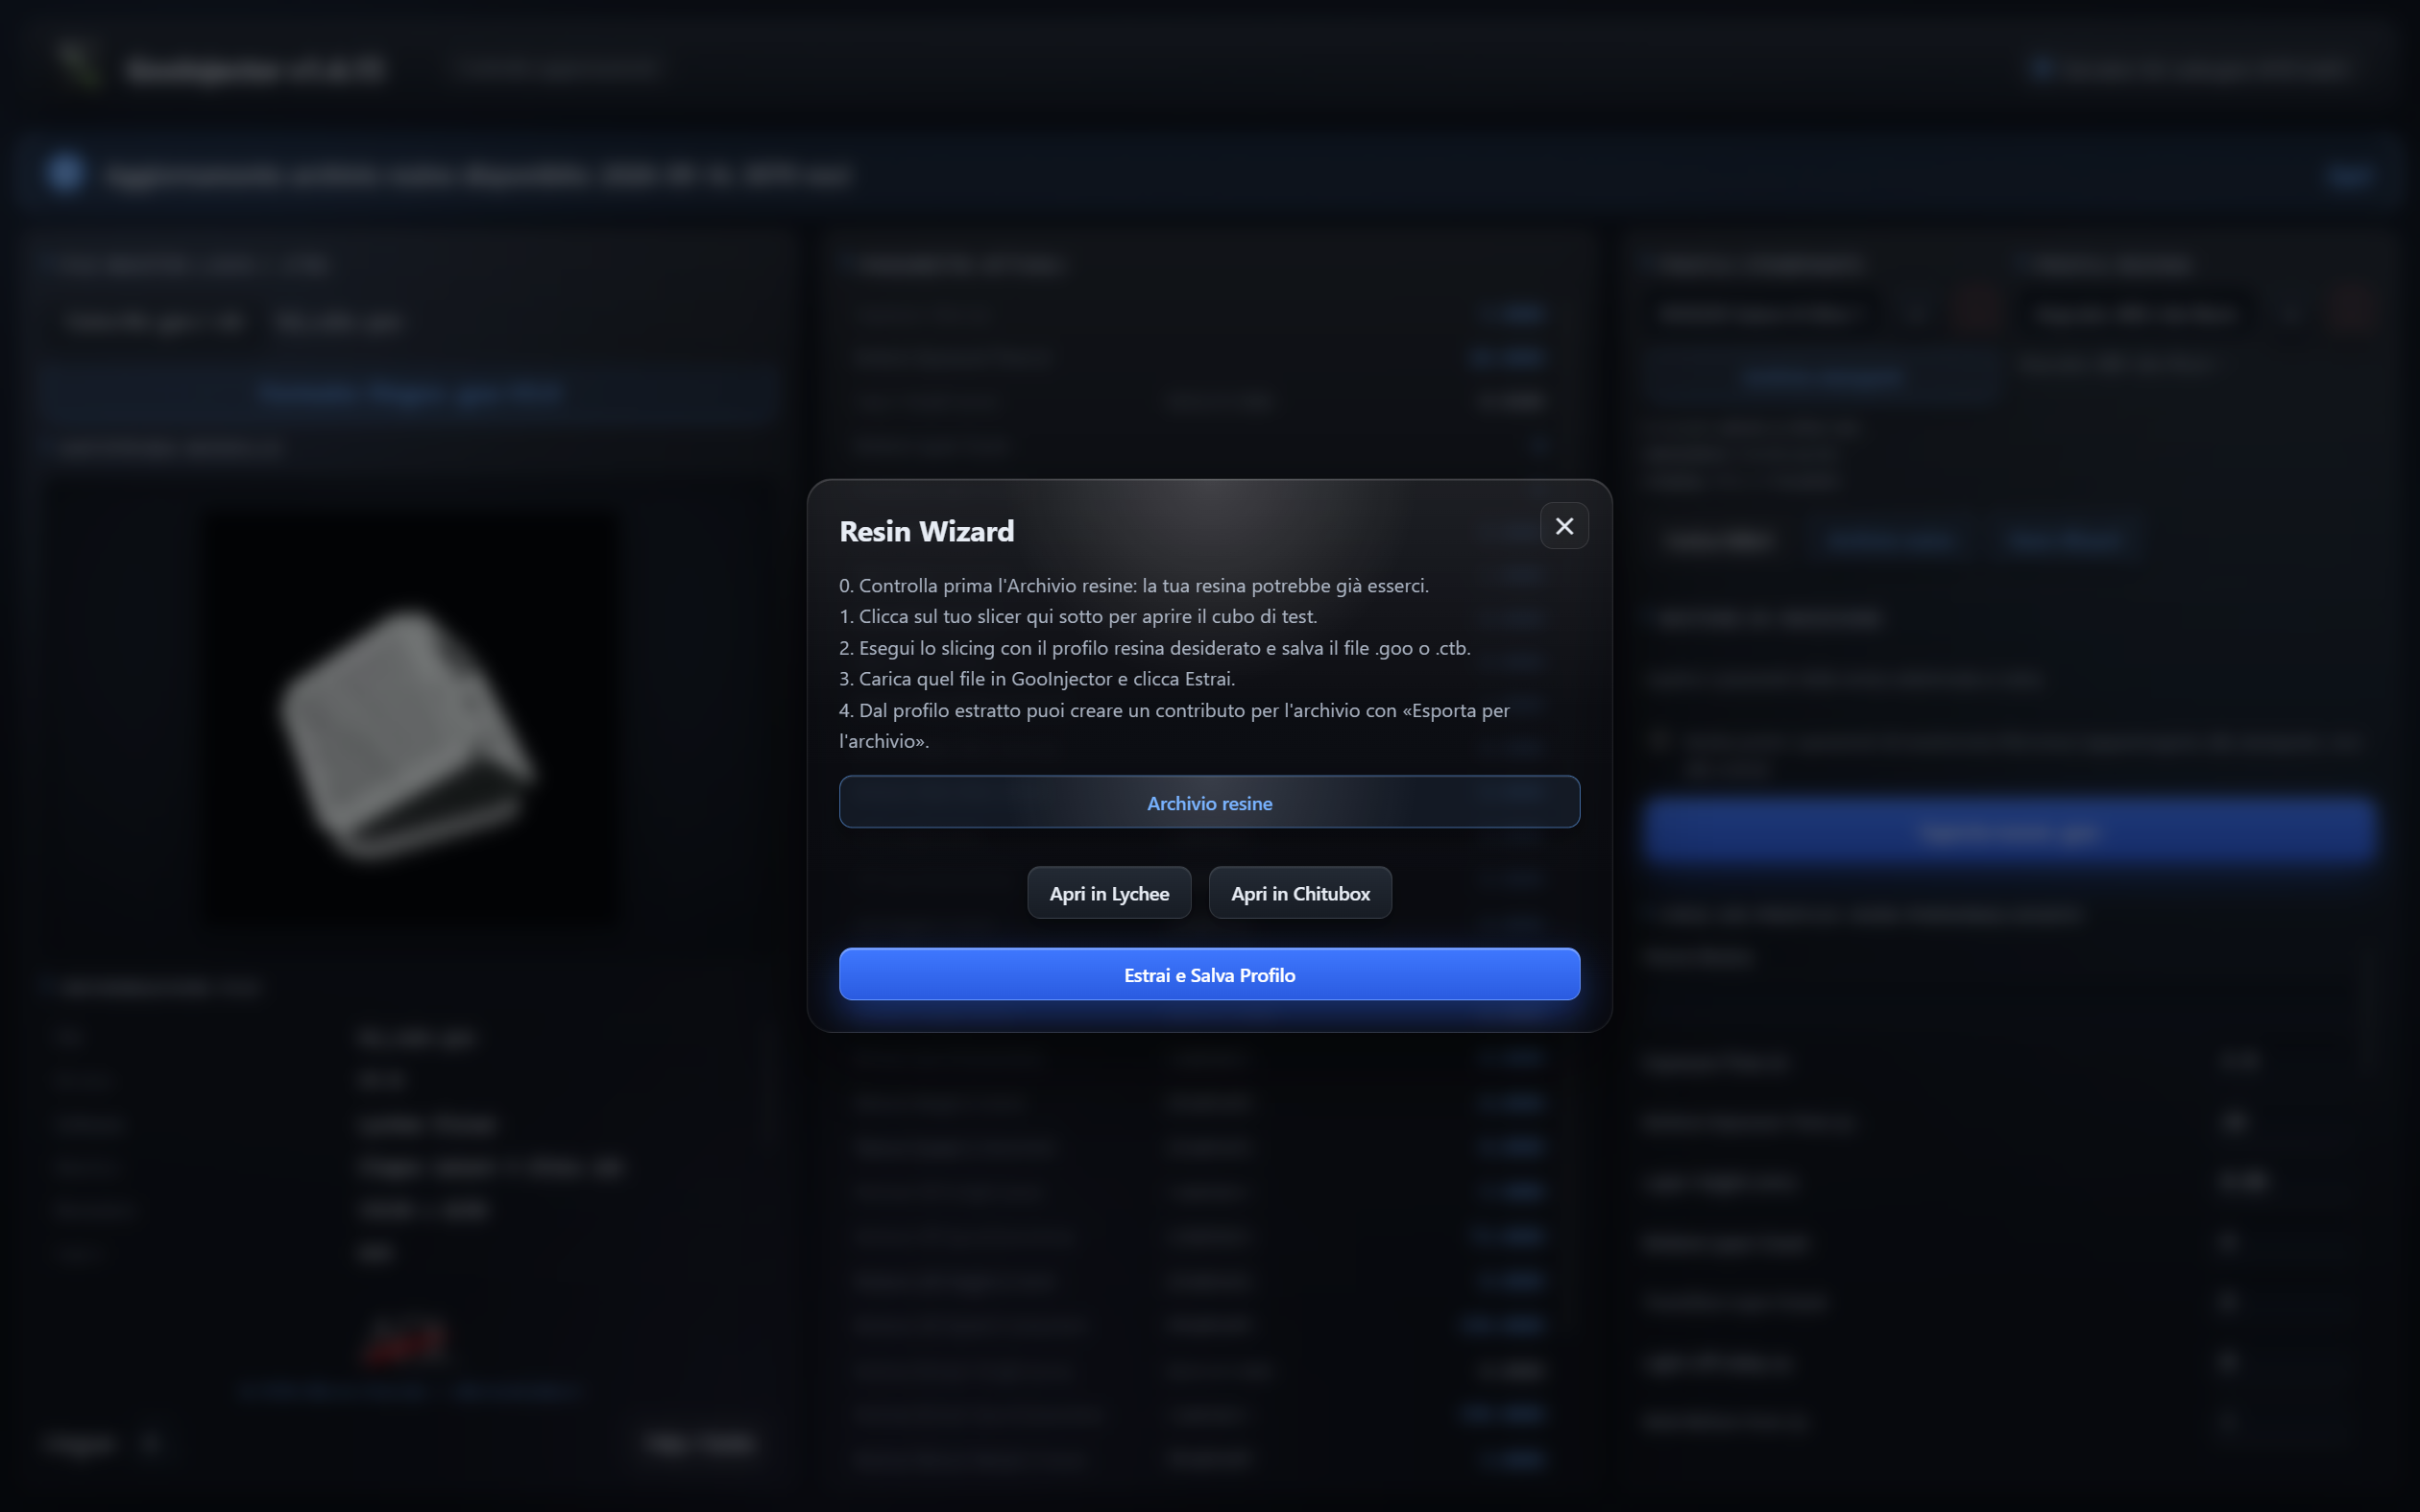
Resin Wizard: opens the calibration cube in Lychee or Chitubox and extracts the resin profile from a sliced .goo or .ctb
Layer height warning
Warning when the resin profile is meant for a layer height different from that of the loaded file
Built-in resin database
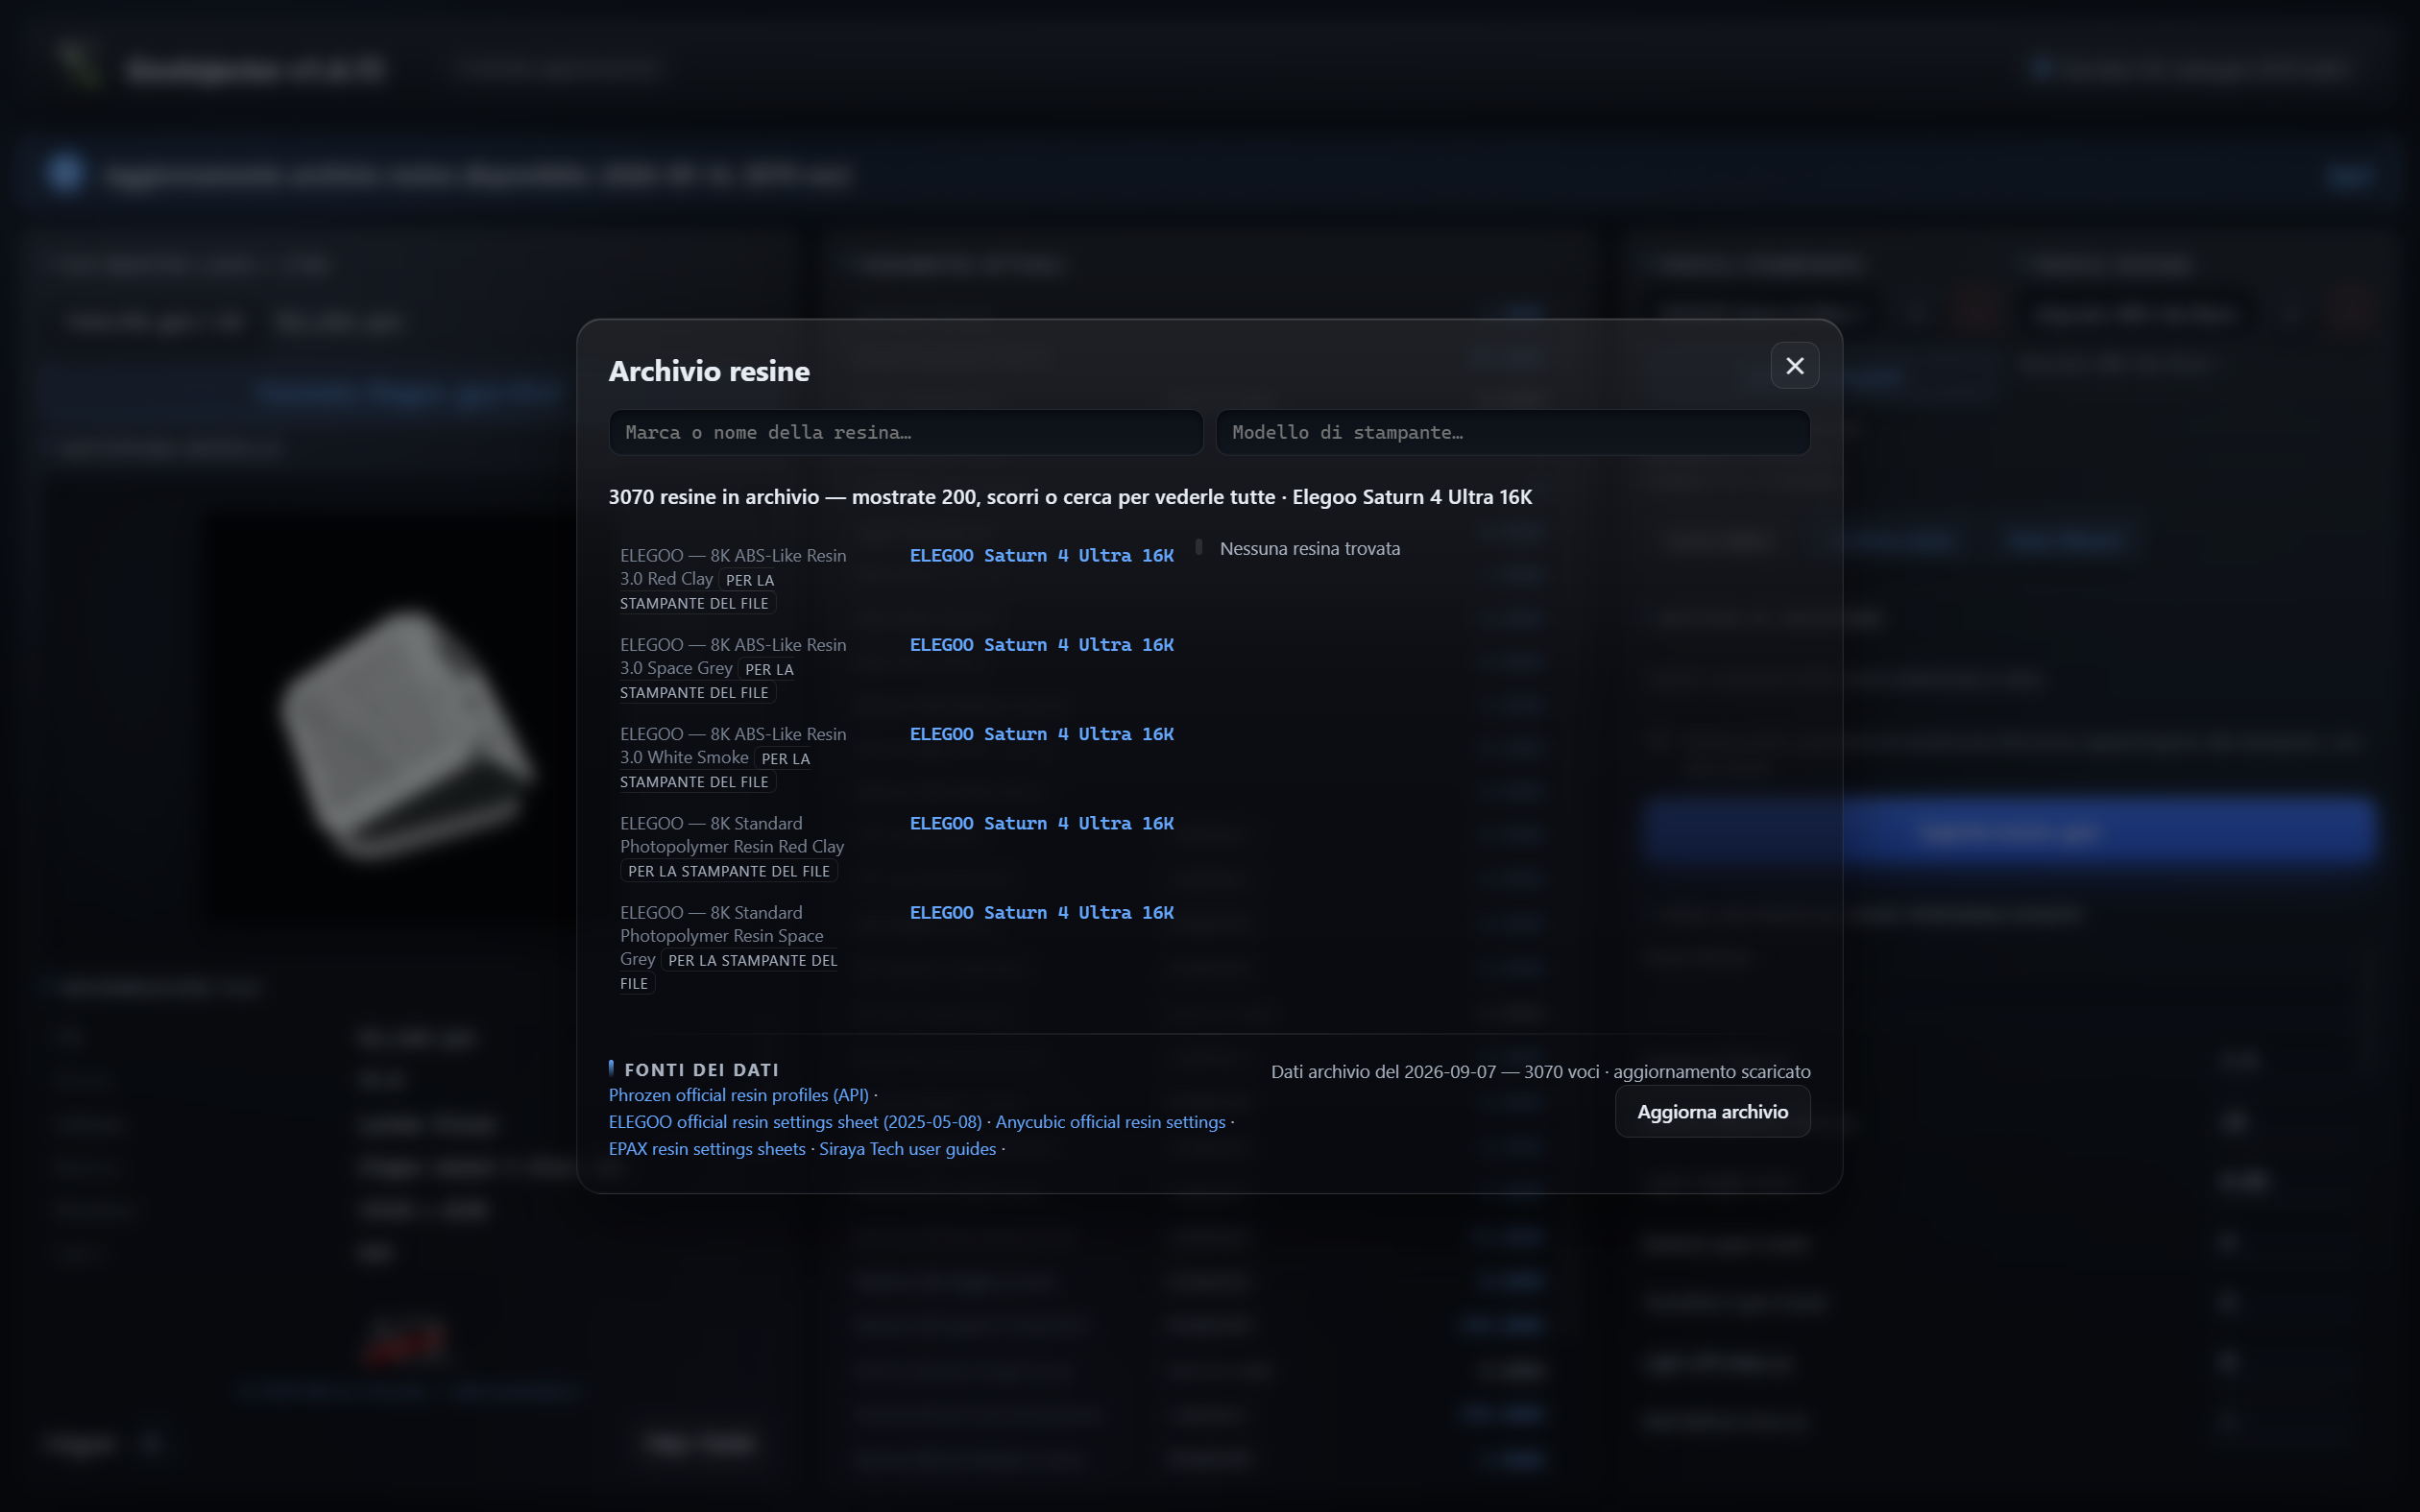
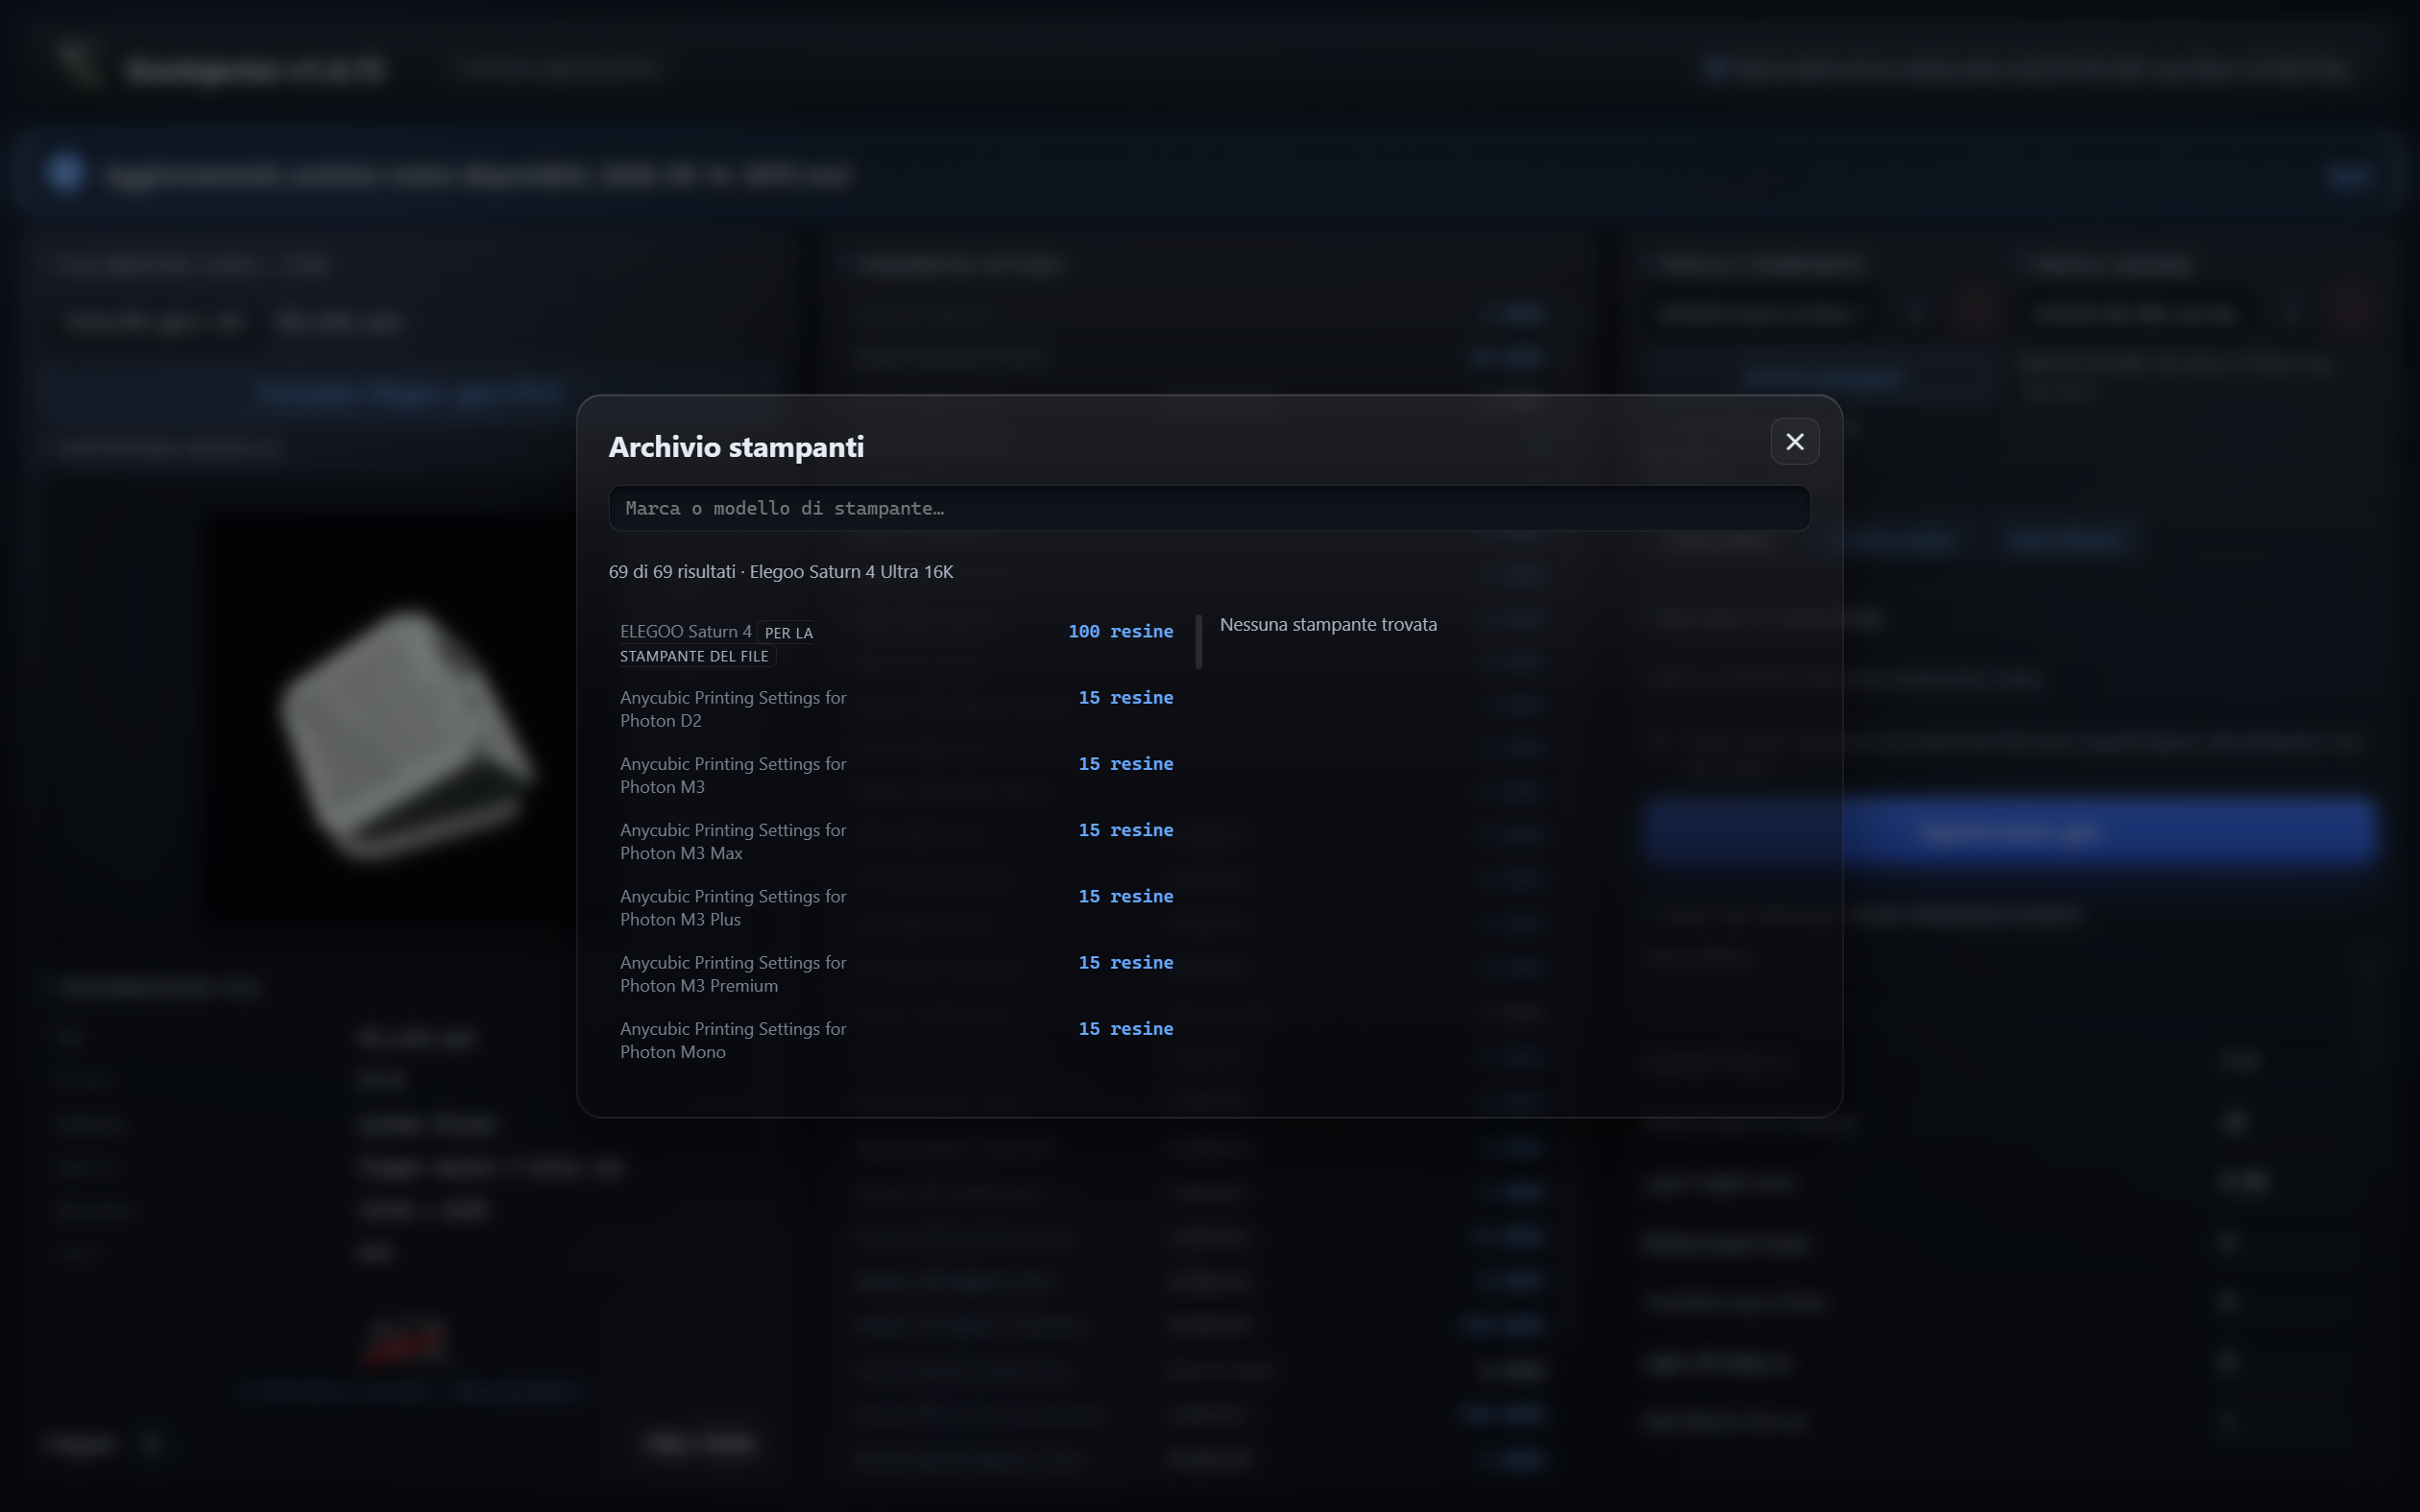
Built-in resin database: over 3,000 printer/resin combinations collected from the manufacturers' official sources (Phrozen, ELEGOO, Anycubic, EPAX, Siraya Tech), browsable offline with search by brand, resin and printer
Your own printer's profiles first
The profiles tested on the printer of the loaded file are listed first; every entry declares its source and collection date
Printer database
Printer database derived from the same data: every printer model with its lift/retract motion parameters; when resins report conflicting values the most frequent combination is shown, declaring the entry it comes from, never an average
Resin and printer from the database together
With a resin and a printer from the database selected together, the exposure comes from the resin and the motion from the printer, as declared on screen; the motion parameters are only written if the dedicated checkbox is ticked
Database printers among your own profiles
Printers from the database can be saved among your own profiles as .json and, when reselected, they again supply the motion parameters
Plausibility check
Plausibility check: values that look like placeholders are highlighted in red in the comparison, without blocking
Always up-to-date database
Always up-to-date database: it is rebuilt from the manufacturers' sources every Monday and republished as a zip package on the public copy; at startup the program compares the published date with the local one and, if a newer one exists, announces it with a blinking notice in the bottom bar, which opens a panel with the "Download" button. The "Update database" button does the same on request; with no network nothing changes and you carry on with the built-in database
Export to contribute to the database
Export of one of your own profiles in the database format in order to contribute (manual submission, no automatic upload)
License: online activation, offline verification
Activation with a license key in the XXXX-XXXX-XXXX-XXXX format: verified online only once on the Alberto DevLabs site, then checked offline at every startup; the license is tied to the PC and reinstalling on the same machine does not use up a seat
Interface in five languages
Interface in 5 languages (Italian, English, German, Spanish, French) with persistent choice; version number next to the program name
Self-sizing window
The window sizes itself according to the monitor it opens on, so that all the content stays visible
User data in AppData
User data in AppData: profiles and settings survive updates and work even with the app installed in Program Files
System Requirements
- Windows 10/11 64-bit
- Microsoft Edge WebView2 (installed automatically if missing)
- Alberto DevLabs license key; Internet connection needed only for activation
- Optional Internet connection to download the updated resin database
- Lychee Slicer or Chitubox, optional, for the Resin Wizard
Documentation
Who GooInjector is for
GooInjector is a desktop application for resin printing users who want to reuse a .goo or .ctb file already processed by the slicer, applying different parameters without rebuilding the layer images.
It is useful when you switch resin or want to apply the correct profile to an already prepared job, keeping geometry, supports, orientation and layer height. Compared with reopening the project in the slicer, changing profile and re-slicing, it lets you start from the existing print file and work on its parameters.
It does not modify the model and does not automatically determine the best settings. If you need to change geometry, supports or layer height, you have to go back to the slicer.
Installation and activation
Requirements
- 64-bit Windows 10/11.
- Microsoft Edge WebView2, installed by the installer if missing.
- An Alberto DevLabs license key and an Internet connection to activate it.
- A supported
.gooor.ctbfile to apply the profiles to. - Optional connection to check and download program and archive updates.
- Lychee Slicer or Chitubox, optional, to prepare the test cube through the Resin Wizard.
The window is resizable and picks an initial size based on the monitor. The intended minimum size is 900 × 640 logical units: screens or scaling settings that reduce the available space below that figure may limit the display.
Installing the program
- Open the GooInjector releases page.
- Download and run the Windows installer available in the chosen release. The project provides NSIS and MSI packages.
- Follow the procedure and complete the WebView2 installation if required.
- Launch GooInjector.
Rust, Node.js or development tools are not needed to use the installed version.
Activating the license
On first launch, enter a key in the XXXX-XXXX-XXXX-XXXX format. The app sends the activation request to albertodevlabs.it together with the local PC identifier and stores the signed license it receives.
On subsequent launches it checks the signature, the product and the machine identifier locally. Verifying an already valid license does not require a network connection; update checks are separate operations.
The distribution stated by the author is Free Only; access via key is still required. The licenza.json and guid-macchina.txt files are stored in the application configuration folder. Reinstalling while keeping this data lets you reuse the PC identifier; deleting the identifier is not equivalent to a normal reinstall with preserved data.
If activation fails, read the message shown: it may concern the connection, the key, the product, the available seats or the local save. A missing or invalid local license takes you back to the activation procedure.
Formats, inputs and outputs
Print files
| Format | Versions | Parameter availability |
|---|---|---|
Elegoo .goo | V3.0 | Reads the 30 parameters of the format; injection uses the subset handled by the profiles. |
Chitubox .ctb | v2 and v3 | Parameters according to version: exposures, bottom layers, light-off delay and basic motion; transitions from v3. |
Chitubox .ctb | v4 and v5 | Includes the additional wait and two-stage motion fields provided by the file. |
Encrypted Chitubox .ctb | v4 and v5 | Handles the encrypted settings block, updating the relevant signature. |
The interface shows the parameters the reader exposes for the file actually loaded. The legacy .cbddlp and .photon layouts, versions 1 and 2, are recognised by the reading core, but the application's file picker only offers .goo and .ctb.
The export result stays within the input format family. It is not a conversion between .goo and .ctb, nor an adaptation of the geometry to another printer. Layer images are preserved; in encrypted CTB files the original encrypted images are kept as well.
Profiles and other inputs
- Chitubox
.cfgxprinter and resin profiles. .jsonprofiles in the program's own format, not arbitrary JSON.- Entries from the bundled archives or from the downloaded updated copy.
- Numeric values entered in the manual editor.
- In the Wizard, the included test cube and the print file produced by the external slicer.
The possible outputs are a new print file, a personal JSON profile, or a JSON to be submitted manually as a contribution to the archive.
Main workflow
1. Load the file
Click Load .goo / .ctb file and select the already prepared file. The window shows name and format, the embedded preview, file information and current parameters.
Check the machine, resolution, layer count and layer height in particular. Some information depends on what the format stores. If there is no usable thumbnail, the app cannot generate a new one from the model.
The current parameters panel is read-only. Loading a file also initialises the manual editor values, but it does not automatically apply a new profile.
2. Choose the resin
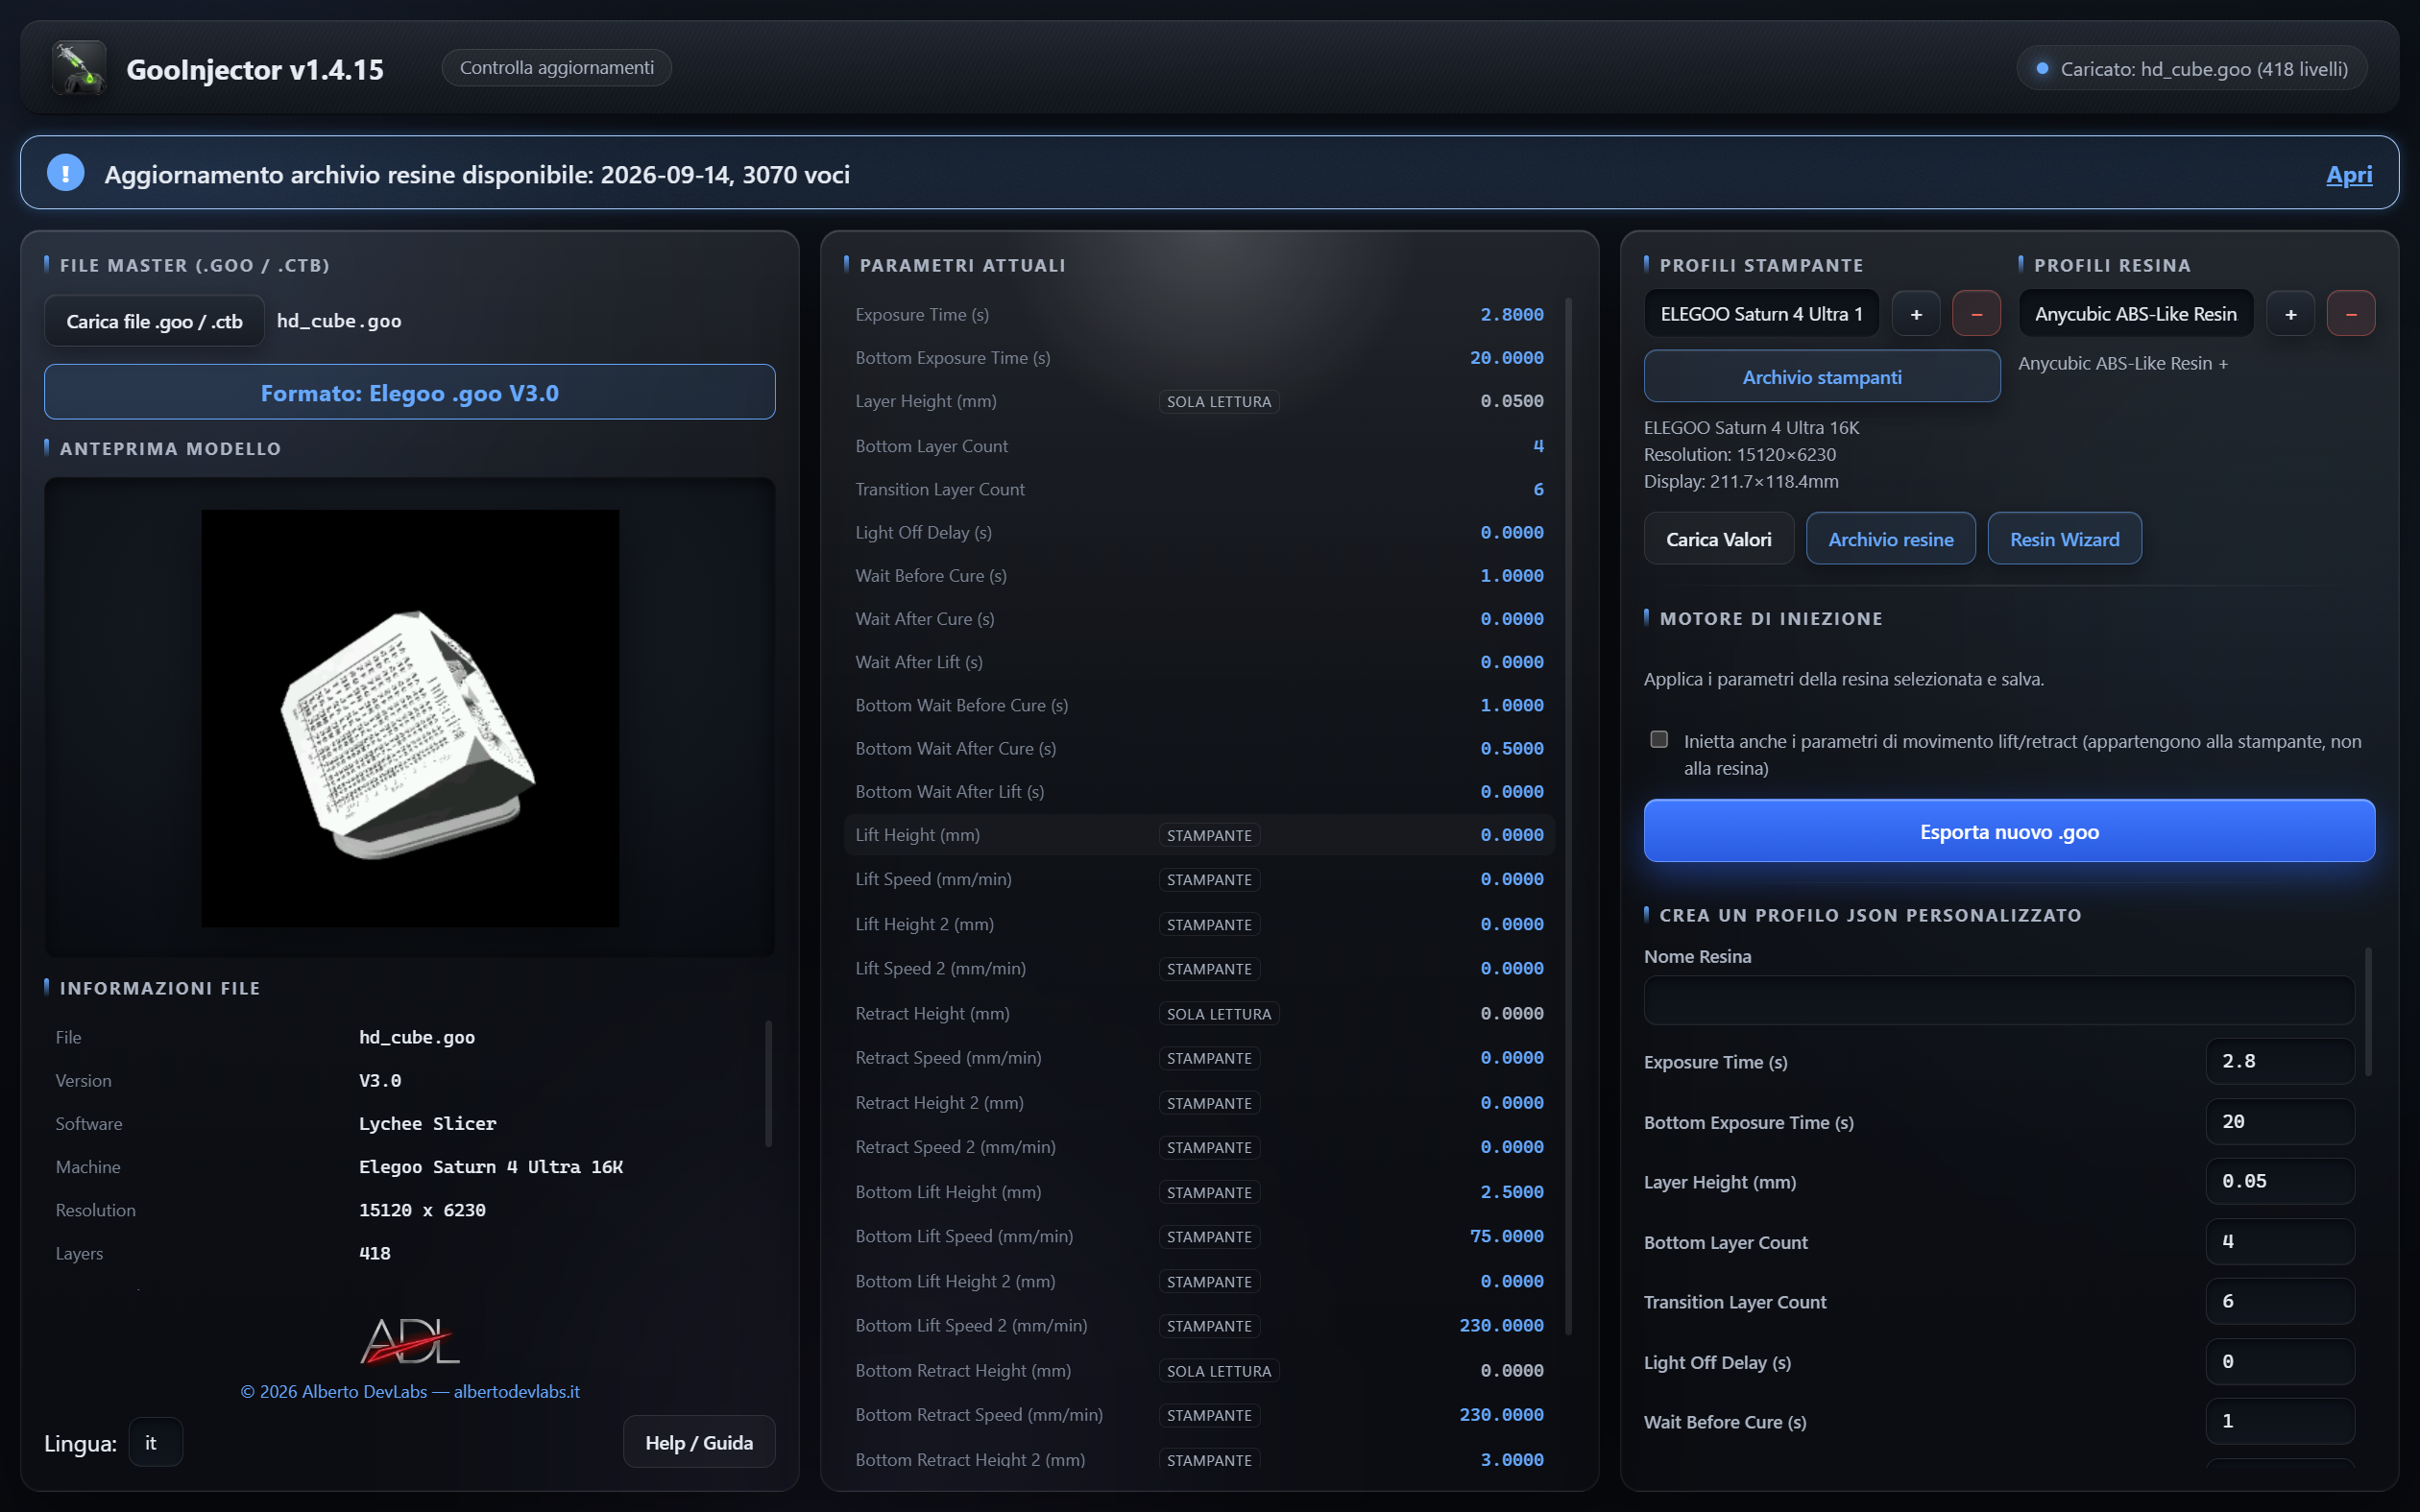
Select a profile from Resin profiles, pick an entry in the Resin archive, or create the profile with the editor or the Wizard.
Selecting from the archive replaces a personal profile selection and vice versa. Check the name of the active resin. If its layer height differs from the file's, the program shows a warning: it does not change the file's layer height and does not automatically convert the exposures.
3. Decide whether to apply the motion settings
The checkbox for lift and retract is off by default. Leave it off to keep the file's motion settings.
If you enable it:
- a selected printer that contains motion data supplies those values;
- if such data is missing, the motion values in the active resin profile are used;
- with a printer that provides motion and no resin, the program uses the file's other parameters as the base and applies the selected motion values.
With resin and printer both coming from the archive, the resin supplies the exposures and the printer the available motion values; the source is indicated in the interface. An imported .cfgx printer profile supplies identification and dimensional information, but its reader does not extract motion values from it. Printer profiles saved from the archive, on the other hand, can retain them.
4. Review and export
Click Export new .goo / .ctb. When there is a profile to apply, the Injection preview opens showing the parameters that differ, the current value and the new one. You can cancel and correct the selection, or confirm.
Then choose a path different from the original. The suggested name contains the profile name or the _modified suffix; the extension is adjusted to the loaded format. The program writes to the chosen path and has no specific block against choosing the source path: use a distinct name to preserve it.
After the export, the file loaded in memory returns to its initial values, so you can produce other variants from the same base.
With no resin and no motion values to apply, the program goes straight to the save dialog and produces a byte-for-byte copy. If you do apply a profile, the parameter copies inside the layers are updated as well: the absence of differences in the preview list does not on its own guarantee binary identity of the whole file.
Parameters and editor limits
Resin parameters
The profile handles normal and bottom exposure, number of bottom and transition layers, light-off delay, wait times before and after cure and after lift, including the bottom variants, and normal and bottom PWM intensity.
Times and exposures are expressed in seconds. Counts and PWM are integers. The application updates the supported fields in the header and in the layer definitions, distinguishing bottom layers from normal ones and recomputing the exposure ramp of the transition layers.
Motion parameters
The available fields include heights in millimetres and speeds in millimetres per minute for lift and retract, with variants for bottom layers and for the second stage, where supported.
Two fields shown in the editor, Retract Height (mm) and Bottom Retract Height (mm), are not part of the saved resin profile and are not injected. The second-stage fields, such as Retract Height 2 (mm), are separate and can be applied when supported by the format and the selection.
Layer height
Layer Height (mm) can be stored in the profile as a reference for comparison, but it is not injected into the file. Changing it in the editor does not recreate the layers.
Validation and plausibility
The editor requires a name and finite numeric values in all fields. It accepts a decimal point or comma. Integer fields are truncated to the integer part; the backend's numeric types also impose their own representation limits.
The comparison flags some anomalies: zero or negative exposure, bottom exposure lower than the normal one, positive speeds below 1 mm/min and certain motion heights equal to the layer height. These warnings do not block the export and are no substitute for choosing parameters appropriate to the resin and printer.
Managing personal profiles
Importing and deleting
Use + next to the printer or resin list to import one or more compatible .cfgx or .json files. Select the profile from the list to use it. The − button deletes the selected one after confirmation.
Creating or editing a resin
- Load a file to start from its values, or select a resin and click Load values.
- Enter the name and edit the fields in the editor.
- Click Save profile.
- Select the saved profile in the list before exporting.
Use a different name if you also want to keep the previous profile: the name determines the personal file that is saved. Editor changes are not applied to the file until you save and select the profile for export.
Load values also works with a resin from the archive. This lets you create a personal variant of it without modifying the bundled archive.
Contributing to the archive
Export for the archive validates the editor values and opens the save dialog for a JSON file. The contribution can include the machine name from the loaded file. Submission is manual: the command does not upload data online and does not automatically publish the entry.
Resin Wizard
Preparing a profile through the slicer
- Open the Resin Wizard. The archive button lets you first look for a profile that is already available.
- Click Open in Lychee or Open in Chitubox.
- If the slicer is not found in the expected locations, select its executable when prompted.
- In the slicer, prepare the included test cube with the desired printer, resin and settings, then export a supported
.gooor.ctb. - Go back to the main window and load the file you have just obtained.
- Reopen the Wizard and click Extract and save profile.
- Reload the production file and select the extracted profile.
Extraction uses the currently loaded file: merely launching the slicer does not import the result. The Wizard transfers settings; it does not measure a calibration print and does not automatically calculate the optimal exposure.
Resin archive
Searching and selecting
The bundled archive collects data published by the manufacturers; the project materials describe over 3,000 printer/resin combinations and mention Phrozen, ELEGOO, Anycubic, EPAX and Siraya Tech. The consistency and availability of entries depend on the archive edition.
You can search by brand or resin name and by printer, offline as well. Each entry reports its source and collection date. When the file contains the machine name, matching entries are listed first. The sorting uses the name, not a physical check of your printer.
A search can show up to 200 results: narrow the filters to find the entry you want. Check the published parameters before selecting it. When an entry is turned into a profile, missing fields receive the program's default values; they should not all be taken as values declared by the source. So check the final comparison as well.
Updating the archive
At startup the program compares the date of the published archive with the one in use. If it finds a newer version, it shows a flashing notice in the bottom bar. Open it and click Download to install the updated copy. The Update archive button performs the operation on demand.
The project documentation indicates a weekly rebuild on Mondays; the application can only download what has actually been published. The downloaded copy is stored in the user data folder and used instead of the bundled one. With no network or an unreachable source, the local archive remains available.
Printer archive
The printer archive is derived from the resin entries that contain motion parameters. It does not necessarily include every model present in the resin archive.
For each model it picks the most frequent motion combination. In case of a tie it considers the most recent date and then alphabetical order. It shows the source and how many entries share that combination; it does not compute an average and does not determine which setting is best on your particular unit.
Search for the printer, review the values and click Use this printer. To apply the motion values to the file you must also enable the dedicated checkbox in the main window. The save command stores the printer as a personal .json profile, available in later sessions.
Program updates
Next to the program name you see the installed version and, when available, the result of the update check. Check for updates repeats the check and shows the response.
If a new version is offered, Update now downloads the installer showing the progress, then starts the installation and reopens the program. Go to the download page lets you download the package manually, also as an alternative if the built-in download fails.
Updating the program is separate from updating the resin archive. Both require a network connection to obtain new content; local use with a valid license does not depend on the success of the update check.
Languages, data and help
The selector offers Italian, English, German, Spanish and French. The choice is saved and applied without restarting the program. Some technical parameter labels remain in English.
Profiles and settings are stored in the application data folder in AppData, separate from the installation. This lets you keep them across updates and use the program installed in Program Files. The activation files are in the configuration folder. They are retained as long as that data is not removed.
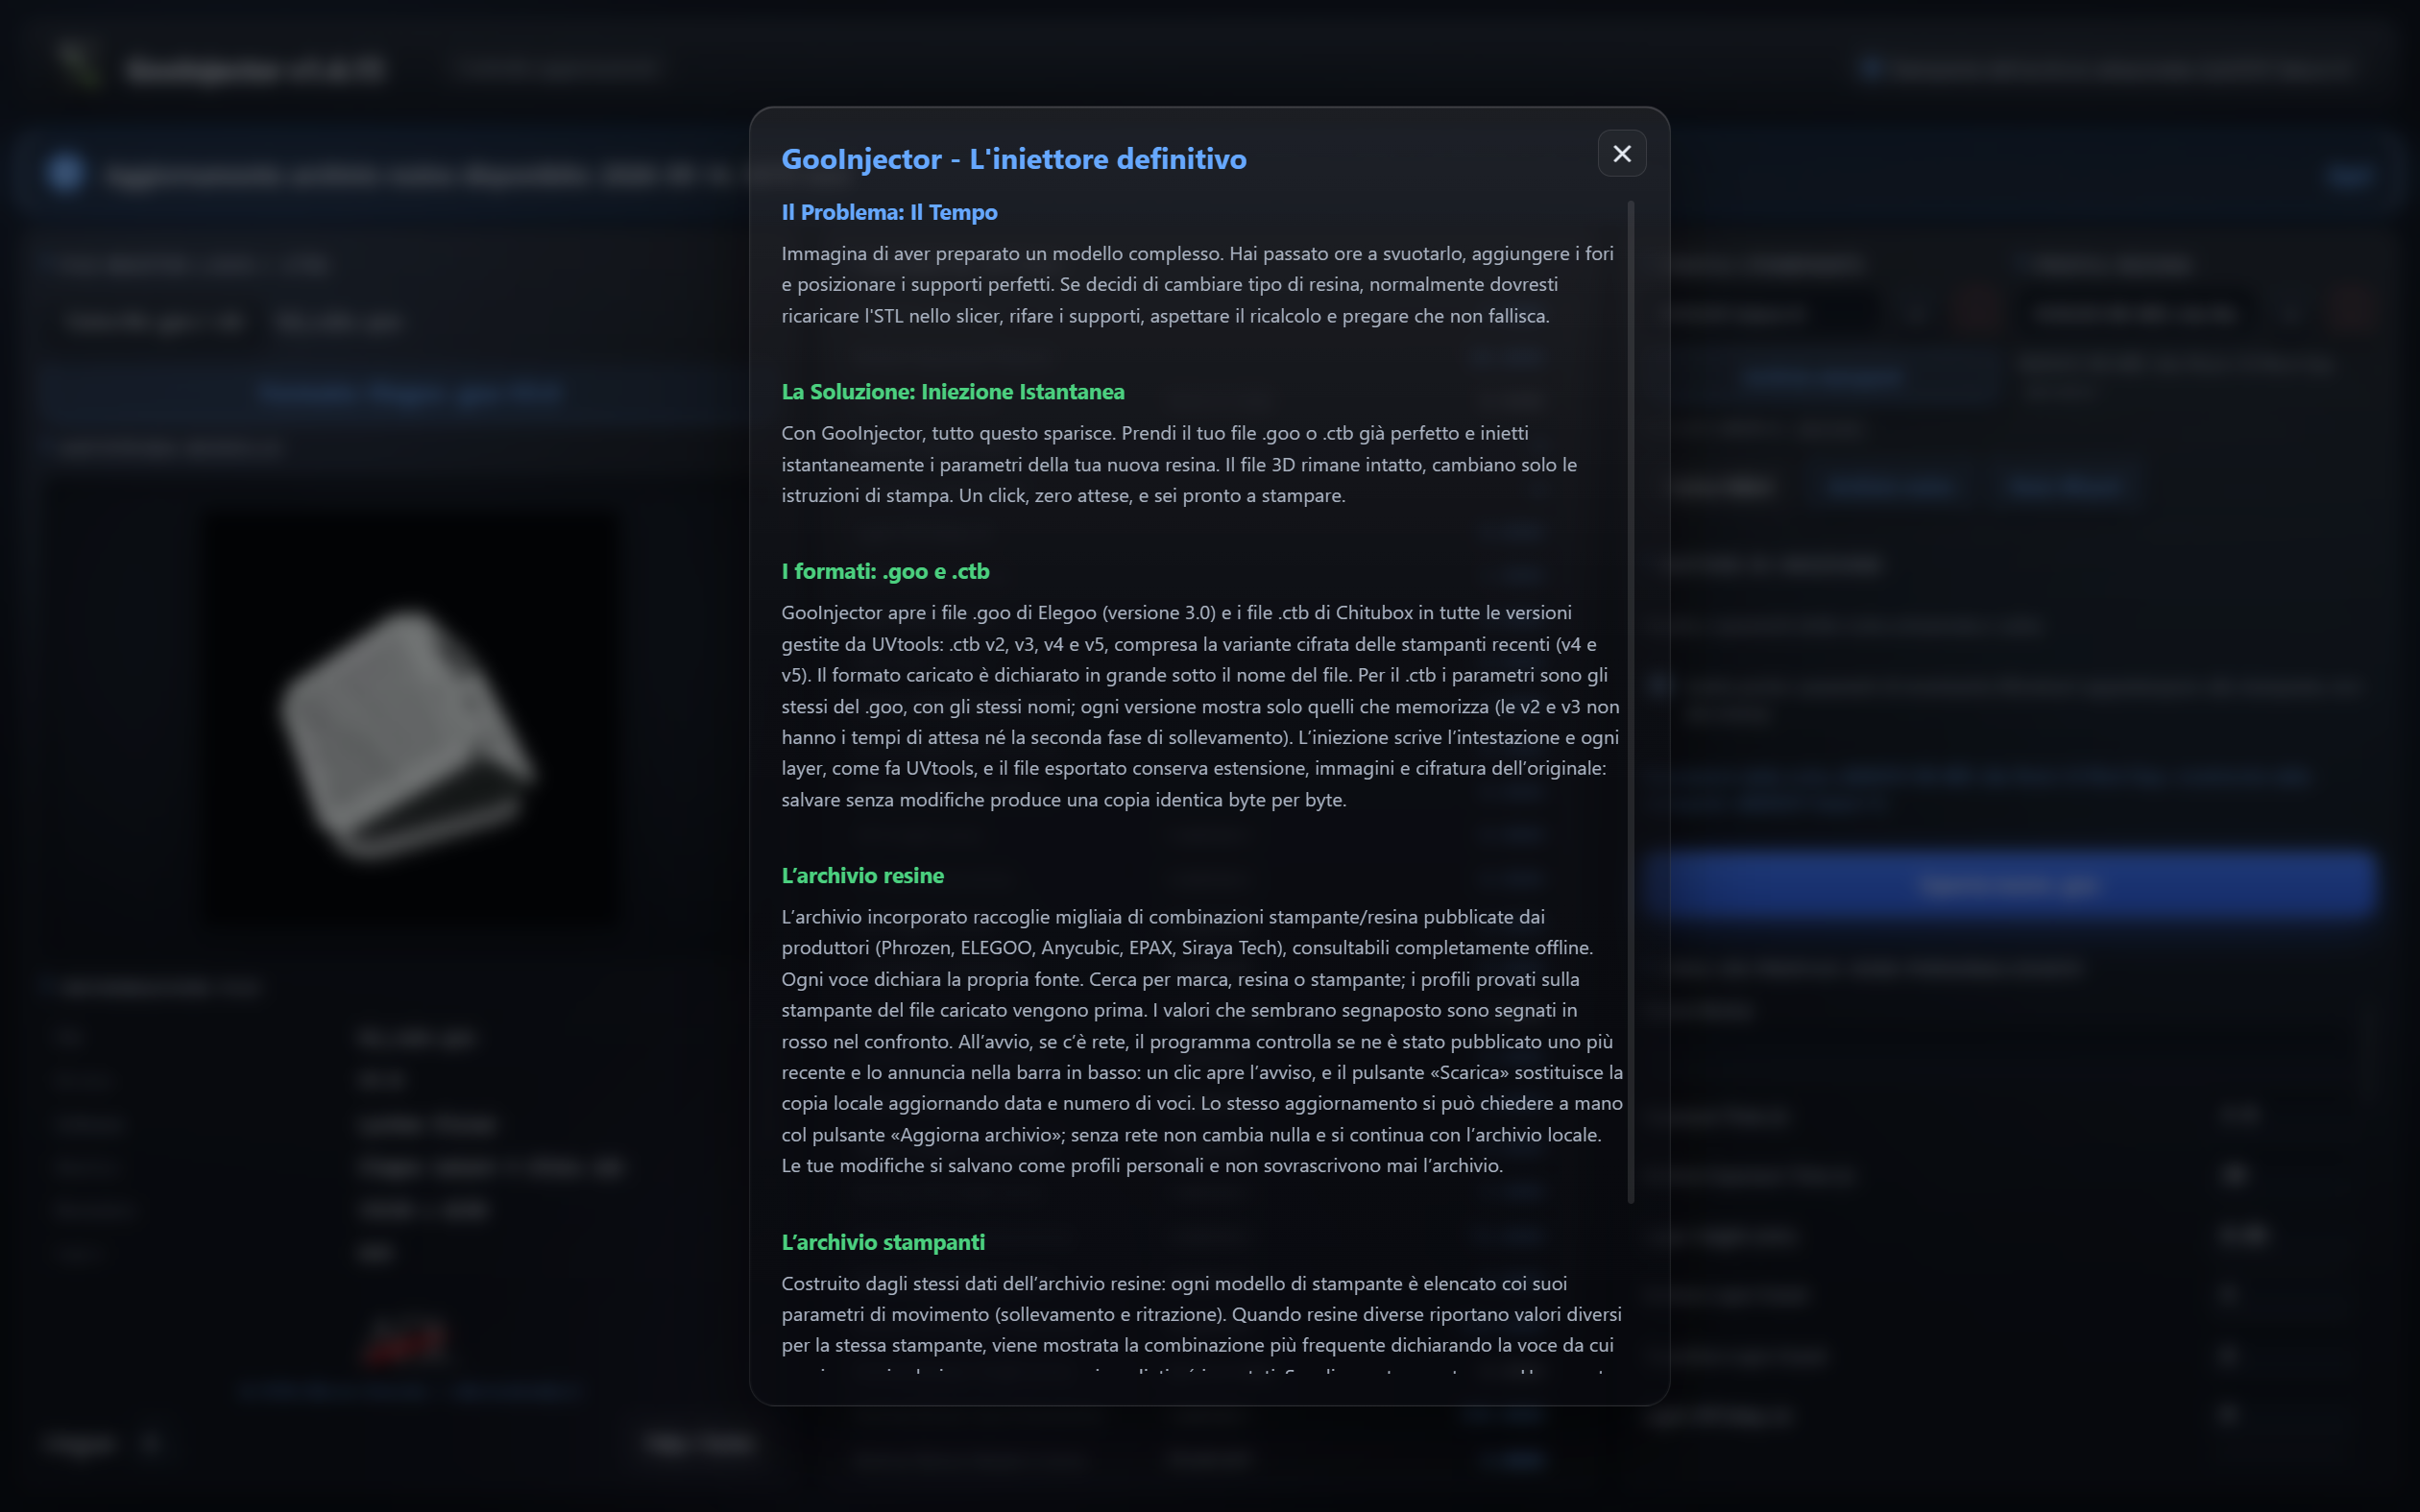
Help / Guide opens the built-in explanation. Errors in loading, profile parsing, saving and exporting are reported in the interface: use the message details to identify the input or path to correct.
Operational limits
- Format compatibility does not guarantee that the parameters are suitable for every machine or resin.
- Selecting a printer does not change the file's resolution, dimensions or geometry.
- There is no format conversion, model editing or automatic print calibration.
- The comparison covers the parameters exposed by the file, not every byte and every internal layer variation.
- Save to a distinct path to preserve the source file on disk.
- Archive data, name matching and plausibility warnings still require the user's own judgement.
Information for those using the sources
The format core is in goo-core/, the desktop backend in src-tauri/ and the Svelte 5 interface in src/. The archive is in resin-archive/ and the collection tool is tools/collect_resins.py.
The project documents stable Rust, Node.js 18+, Tauri CLI v2 and the Windows build tools required by Tauri. The setup and run commands are npm install, cargo install tauri-cli --version "^2" and cargo tauri dev. cargo tauri build produces the packages under target/release/bundle/; cargo test -p goo-core is the documented command for core checks. They are not needed to use the installed version.
Author and references
© 2026 Alberto DevLabs — albertodevlabs.it.
Format handling references UVtools: GooFile.cs for Elegoo .goo V3.0, ChituboxFile.cs and CTBEncryptedFile.cs for the .ctb layouts and rules.
Get it GooInjector
Free
Injects the parameters of a new resin into an already sliced .goo or .ctb file, without re-slicing
DownloadYour browser or Windows may show a warning because the file is new and not yet recognized: choose Keep / Run anyway. The file is safe and published directly by Alberto DevLabs.